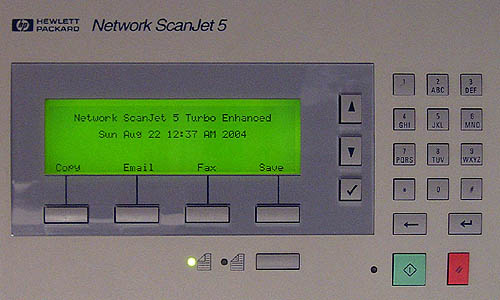
In January 2003, I purchased an HP Network Scanjet 5 scanner on eBay. Upon receiving the scanner, I was disappointed to learn that there was no way to use it without a Windows NT server on the network, as most of the actual processing was offloaded to a Windows application. To get around this limitation, I wrote new software to run on the scanner under FreeBSD, making it into a truly standalone device. This is documented on my Enhanced Network Scanjet 5 web page.
Well, a year and a half of scanning bliss has passed. During that time, I largely rewrite my original code, adding many features that were initially missing. Now I'm at a point where I feel the software is mostly completely stable and fully-featured, so I'm turning to upgrading the hardware.
I have two motivations for the current hardware upgrades; the first one is that I wanted a test case to try out a material I recently discovered for surface-mount chip rework, Chip Quik. I have an extra Scanjet motherboard and I had toyed in the past with the idea of upgrading one, so it seemed a good candidate. Upgrading the Scanjet would give me some practice before undertaking a more critical job that I need to do. So, I decided to replace the Am486DE2 66Mhz processor in the scanner with a pin-compatible Am5x86 133Mhz processor, which would double the processor speed, and also doubles the amount of cache in the processor.
The second motivation is that I have moved and have a new office that is quite a bit larger than my old one. The best layout for the office places one of my laser printers nowhere near either my computer or a server; it is, however, right next to my Scanjet. So, making the scanner a print server as well seemed a logical move -- it is, after a complete computer in itself. All I needed to do is add a parallel port to the scanner, which is mostly easy since there is a second, unused ISA slot inside. I just needed to work out the details of getting the connector from the second slot externally accessible.
AMD's marketing of the Am5x86 processor compared the processor to Intel's 75Mhz Pentium, and even the name "5x86" suggests that this is a Pentium-class processor. While the speed comparison is valid, the Am5x86 is really just a very fast 486-class processor, running at a 33Mhz bus speed and a 133Mhz internal clock. In fact, except for the speed, it is identical to the Am486DE2 processor in the Scanjet 5, making the transplant mostly a mechanical problem.
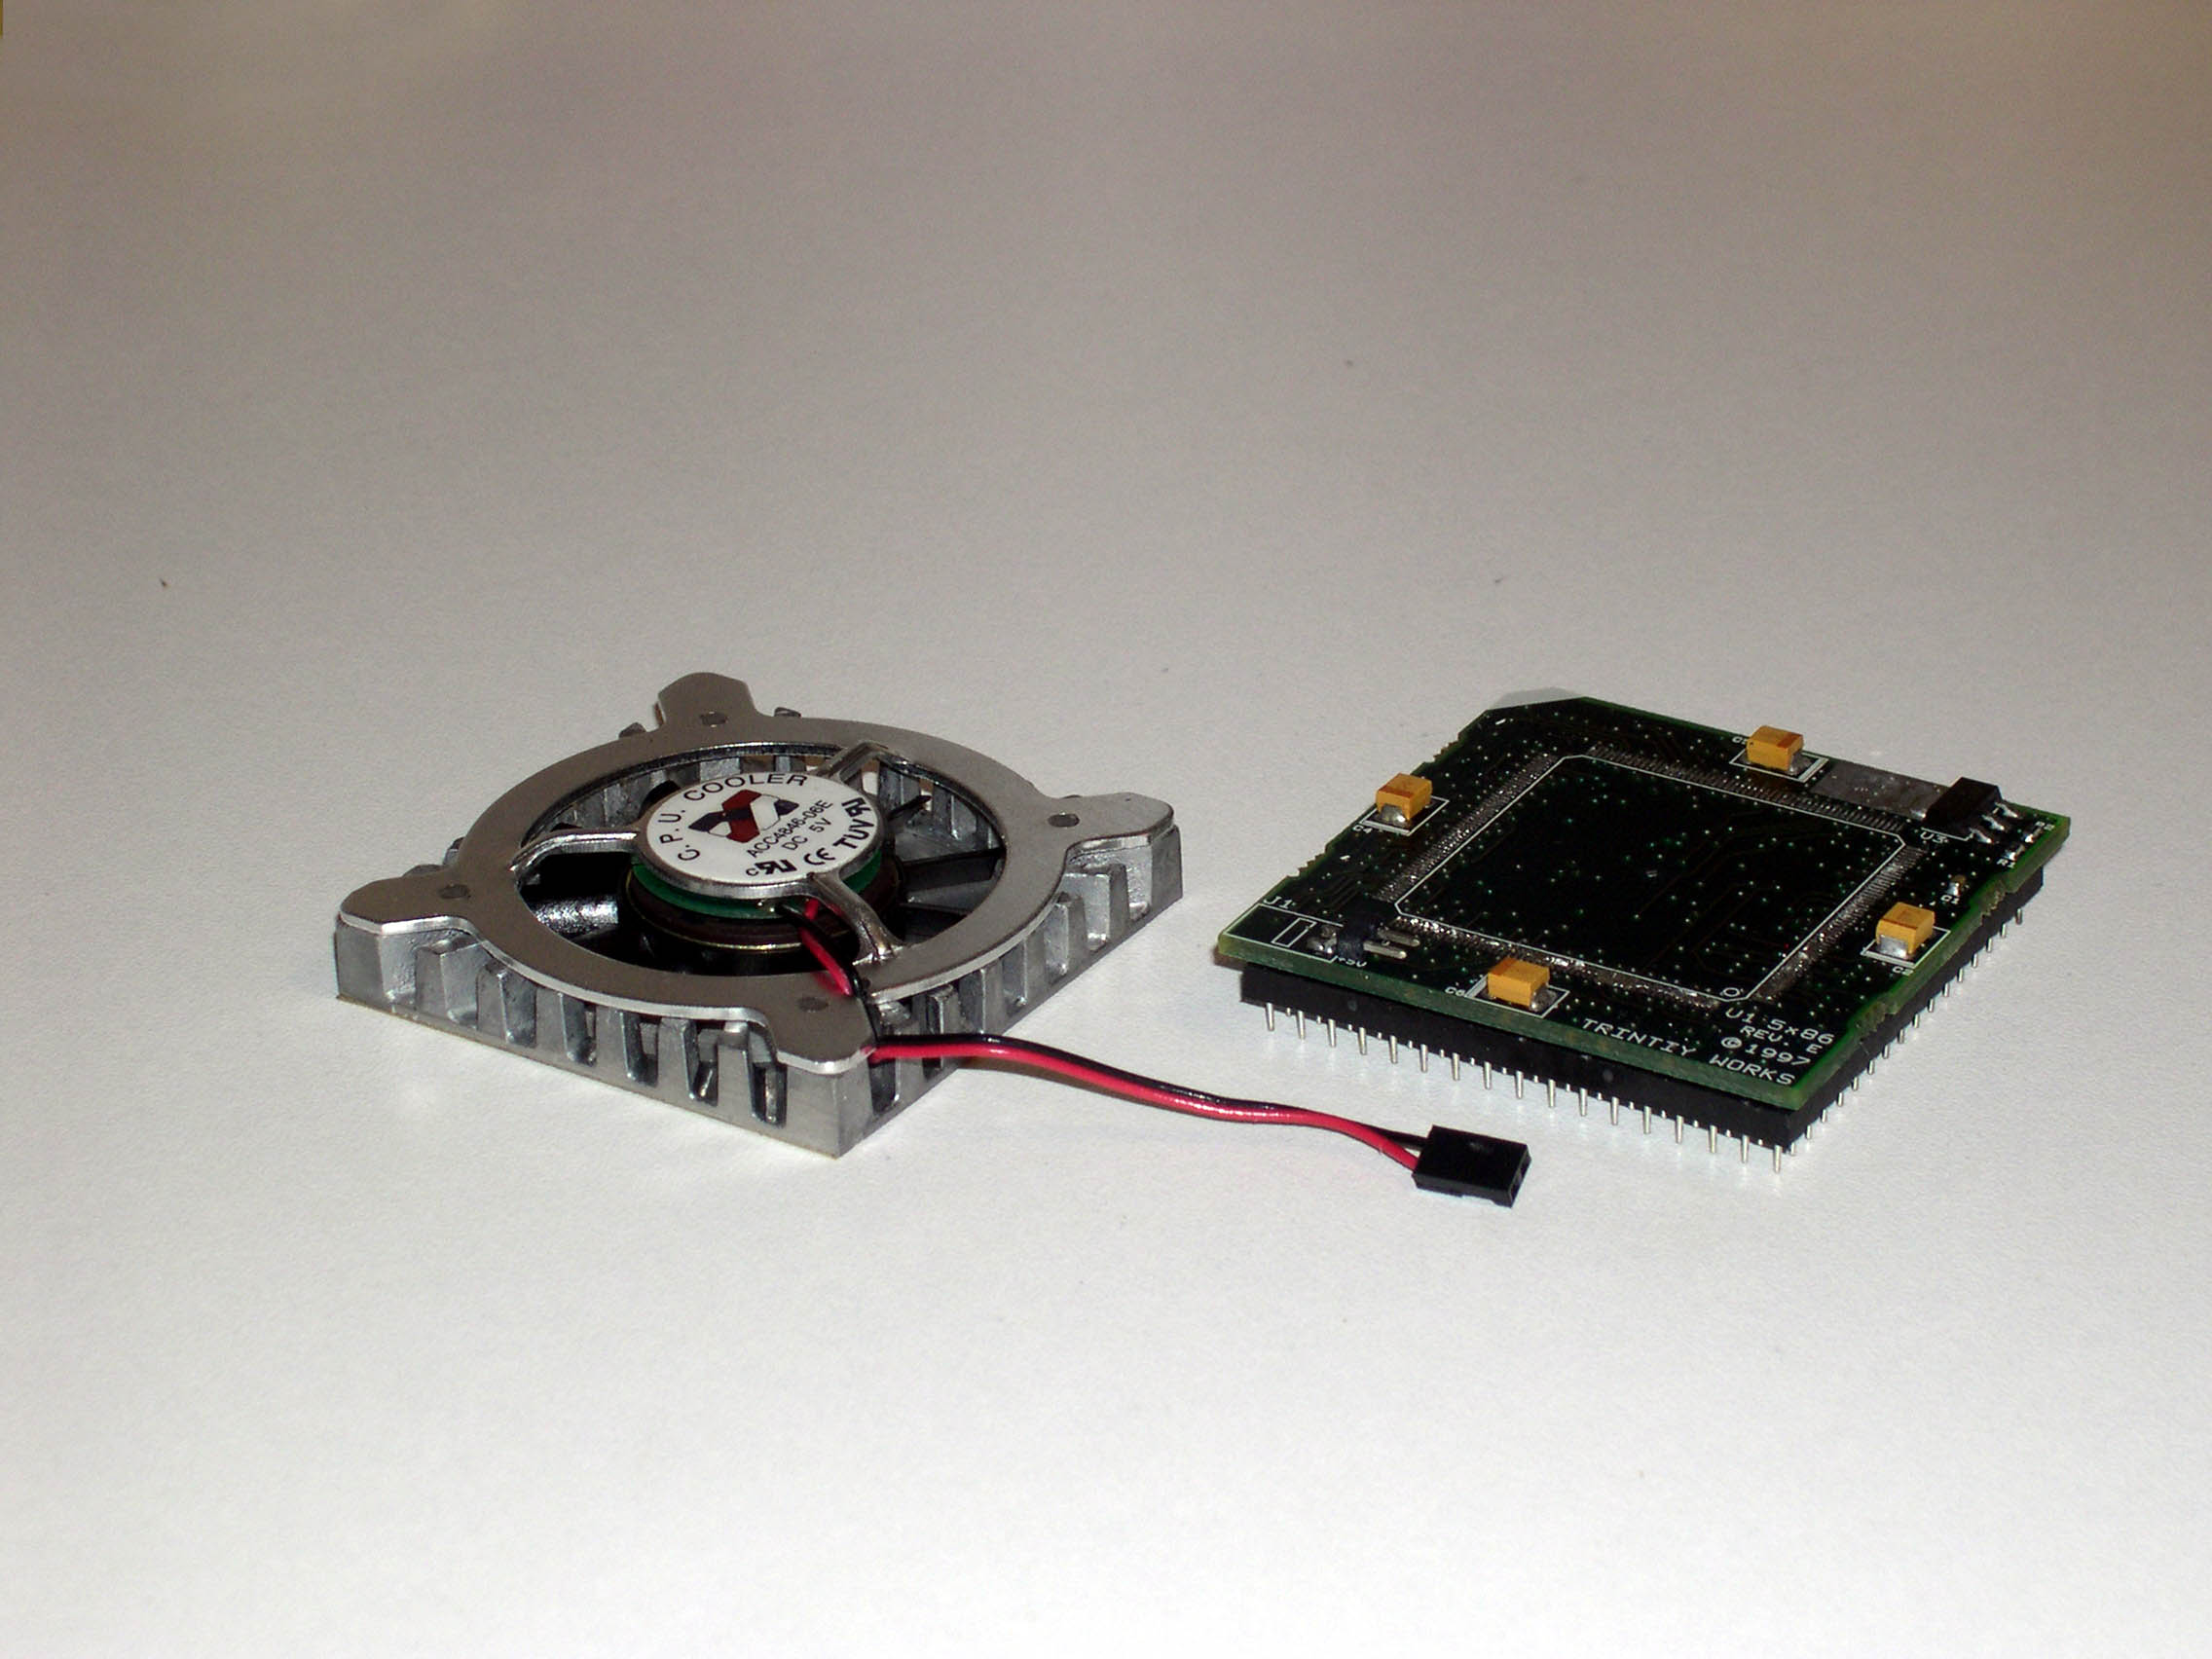
AMD never considered the Am5x86 an "upgrade processor", largely due to the fact the the Am5x86 requires a 3.3 volt power supply and the 486 requires 5 volts. However, numerous third parties manufactured "upgrade processors" that consisted of the Am5x86 and a voltage regulator soldered to a small circuit board with a 486 socket-3 pinout on the bottom. For upgrading the scanner, none of this was necessary, or desirable, since the existing Am486DE2 processor is already a 3.3 volt version of the 486 processor. Since the Am5x86 has not been made for serveral years, I salvaged one from one of these upgrade kits, a "Power Stacker 5x86" make by Trinity Works and purchased on eBay. Here you see what is left of the donor upgrade after the processor was removed:
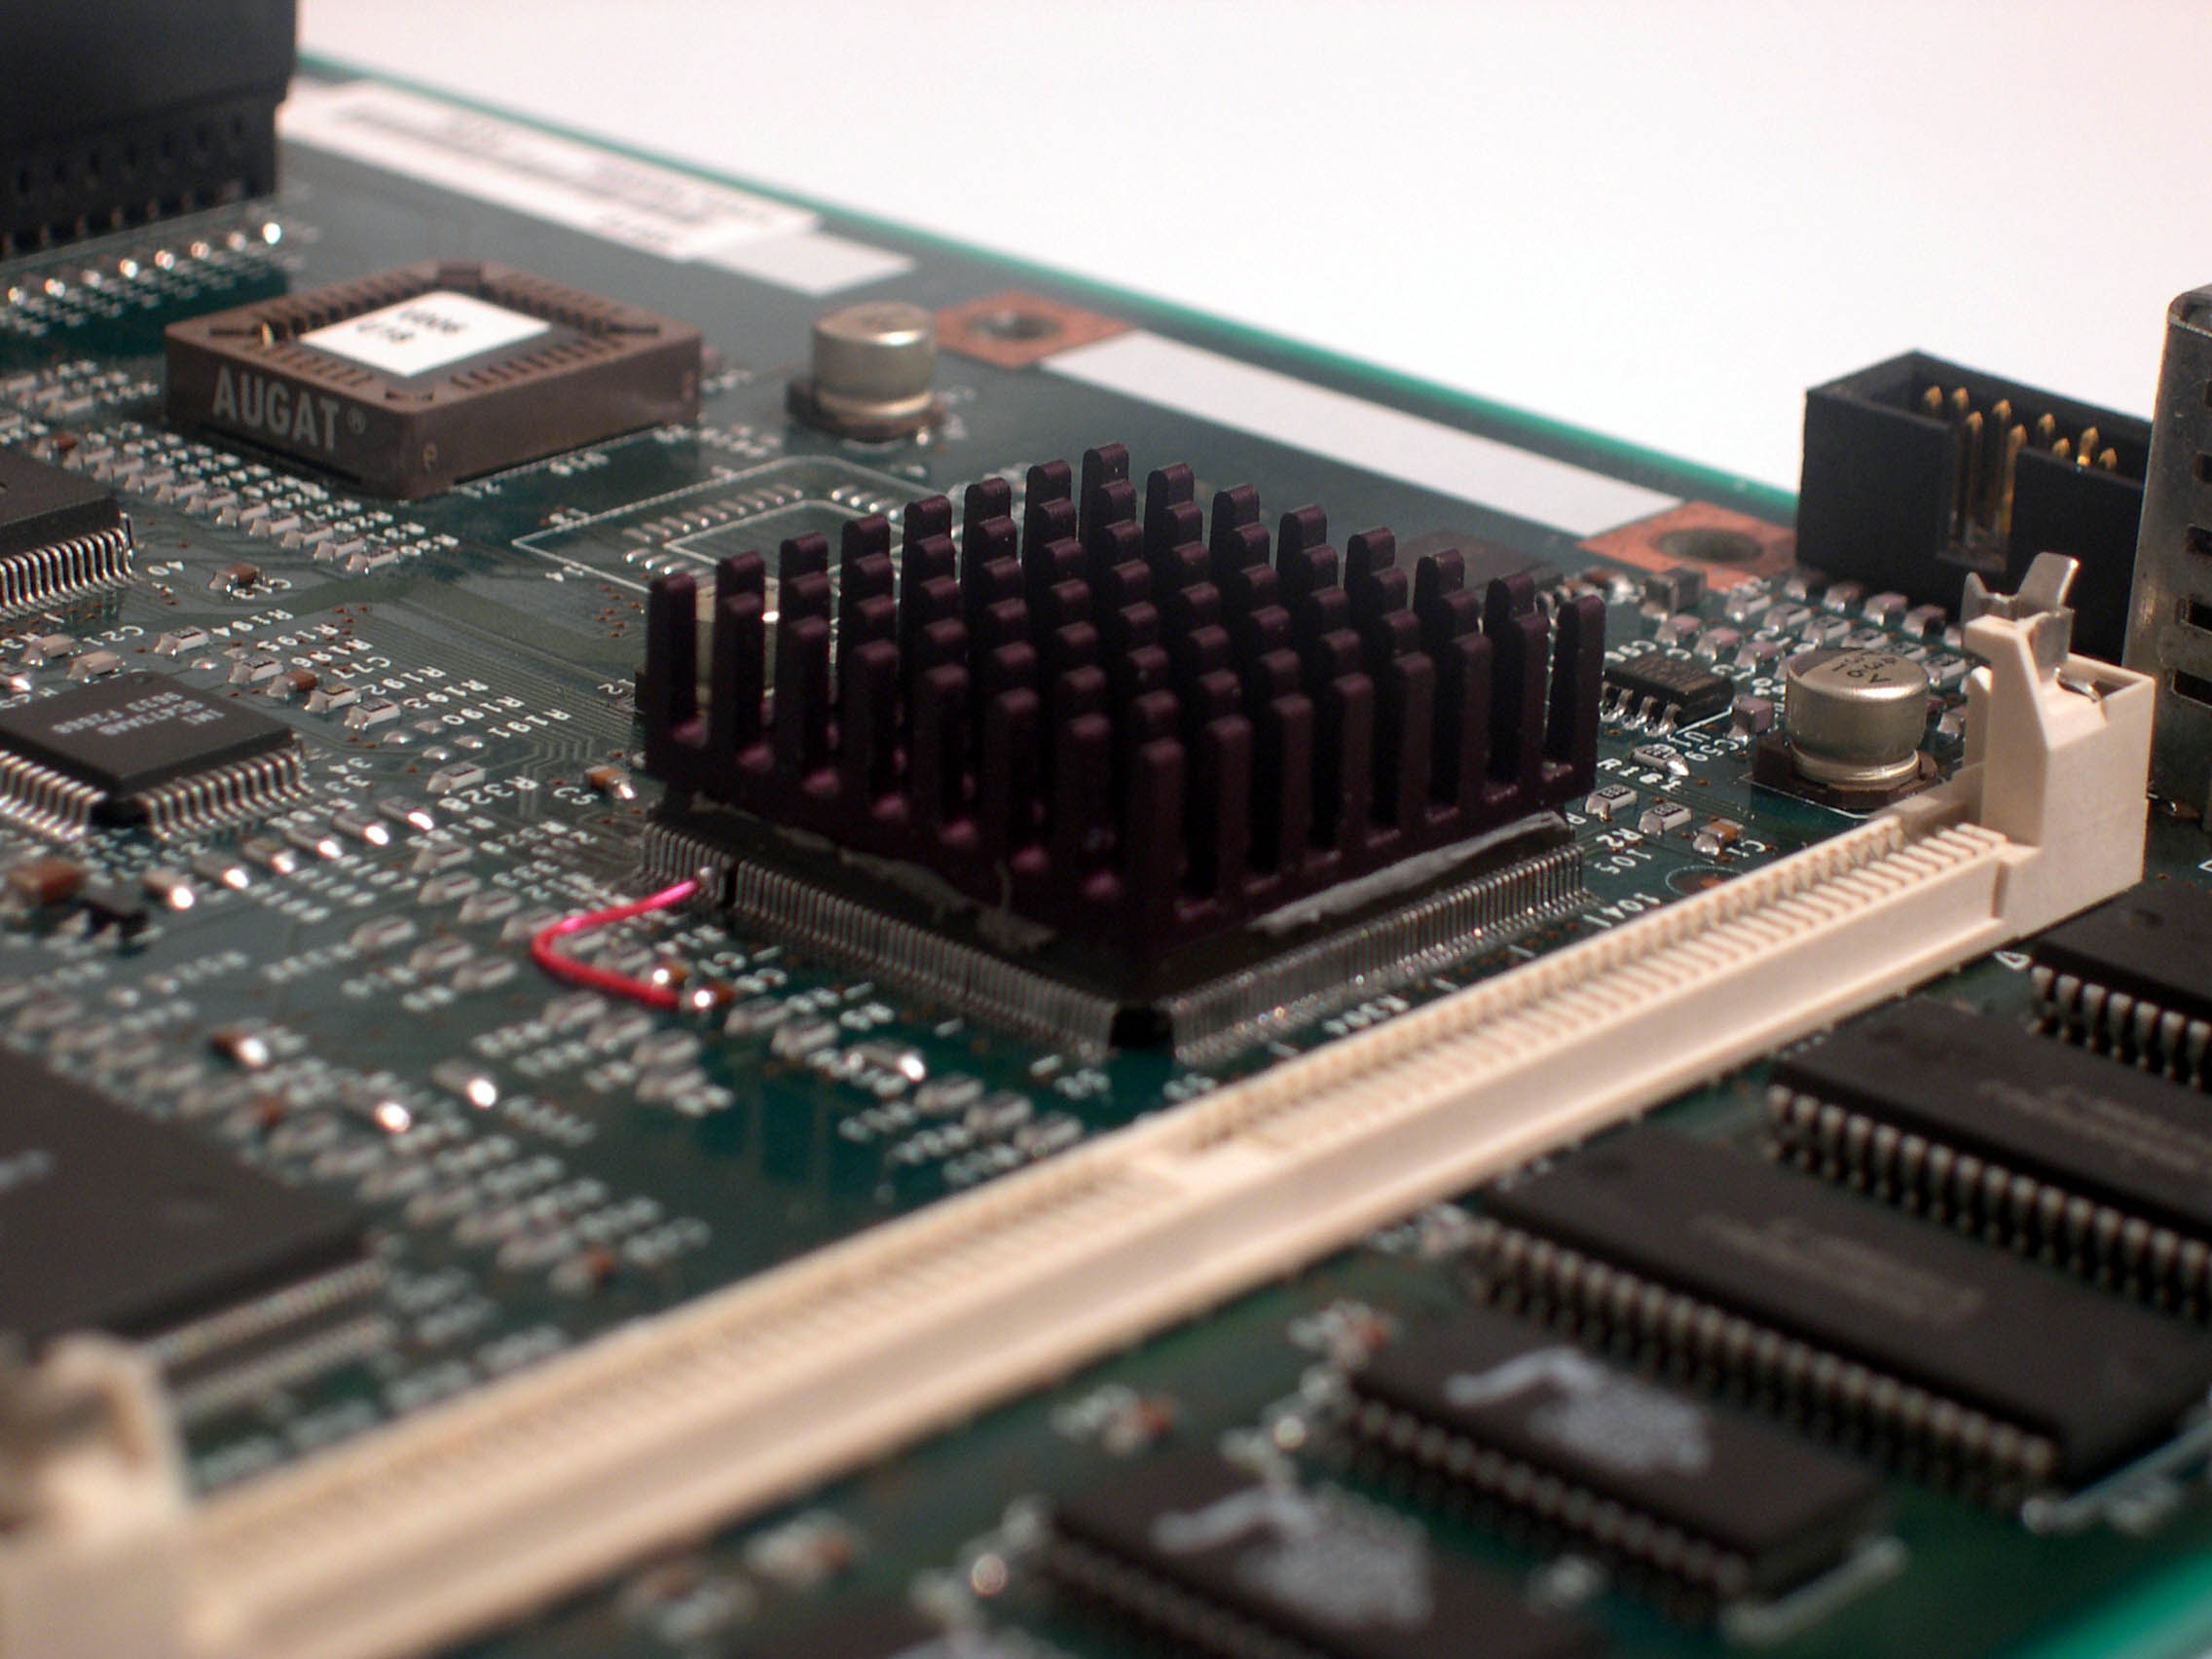
One the new processor was removed from the upgrade, cleaned up, and pins straightened, the existing Am486DE2 processor was removed from the Scanjet motherboard. Once the board was cleaned, the replacement processor was soldered in place. The pin that selects the clock multiplier was left loose from the board and connected to VSS (ground) with a wire to properly select the x4 multiplier to get 133Mhz (33Mhz x 4). Otherwise, the default multiplier is x3, which would give only 100 Mhz. Here is the processor installed:
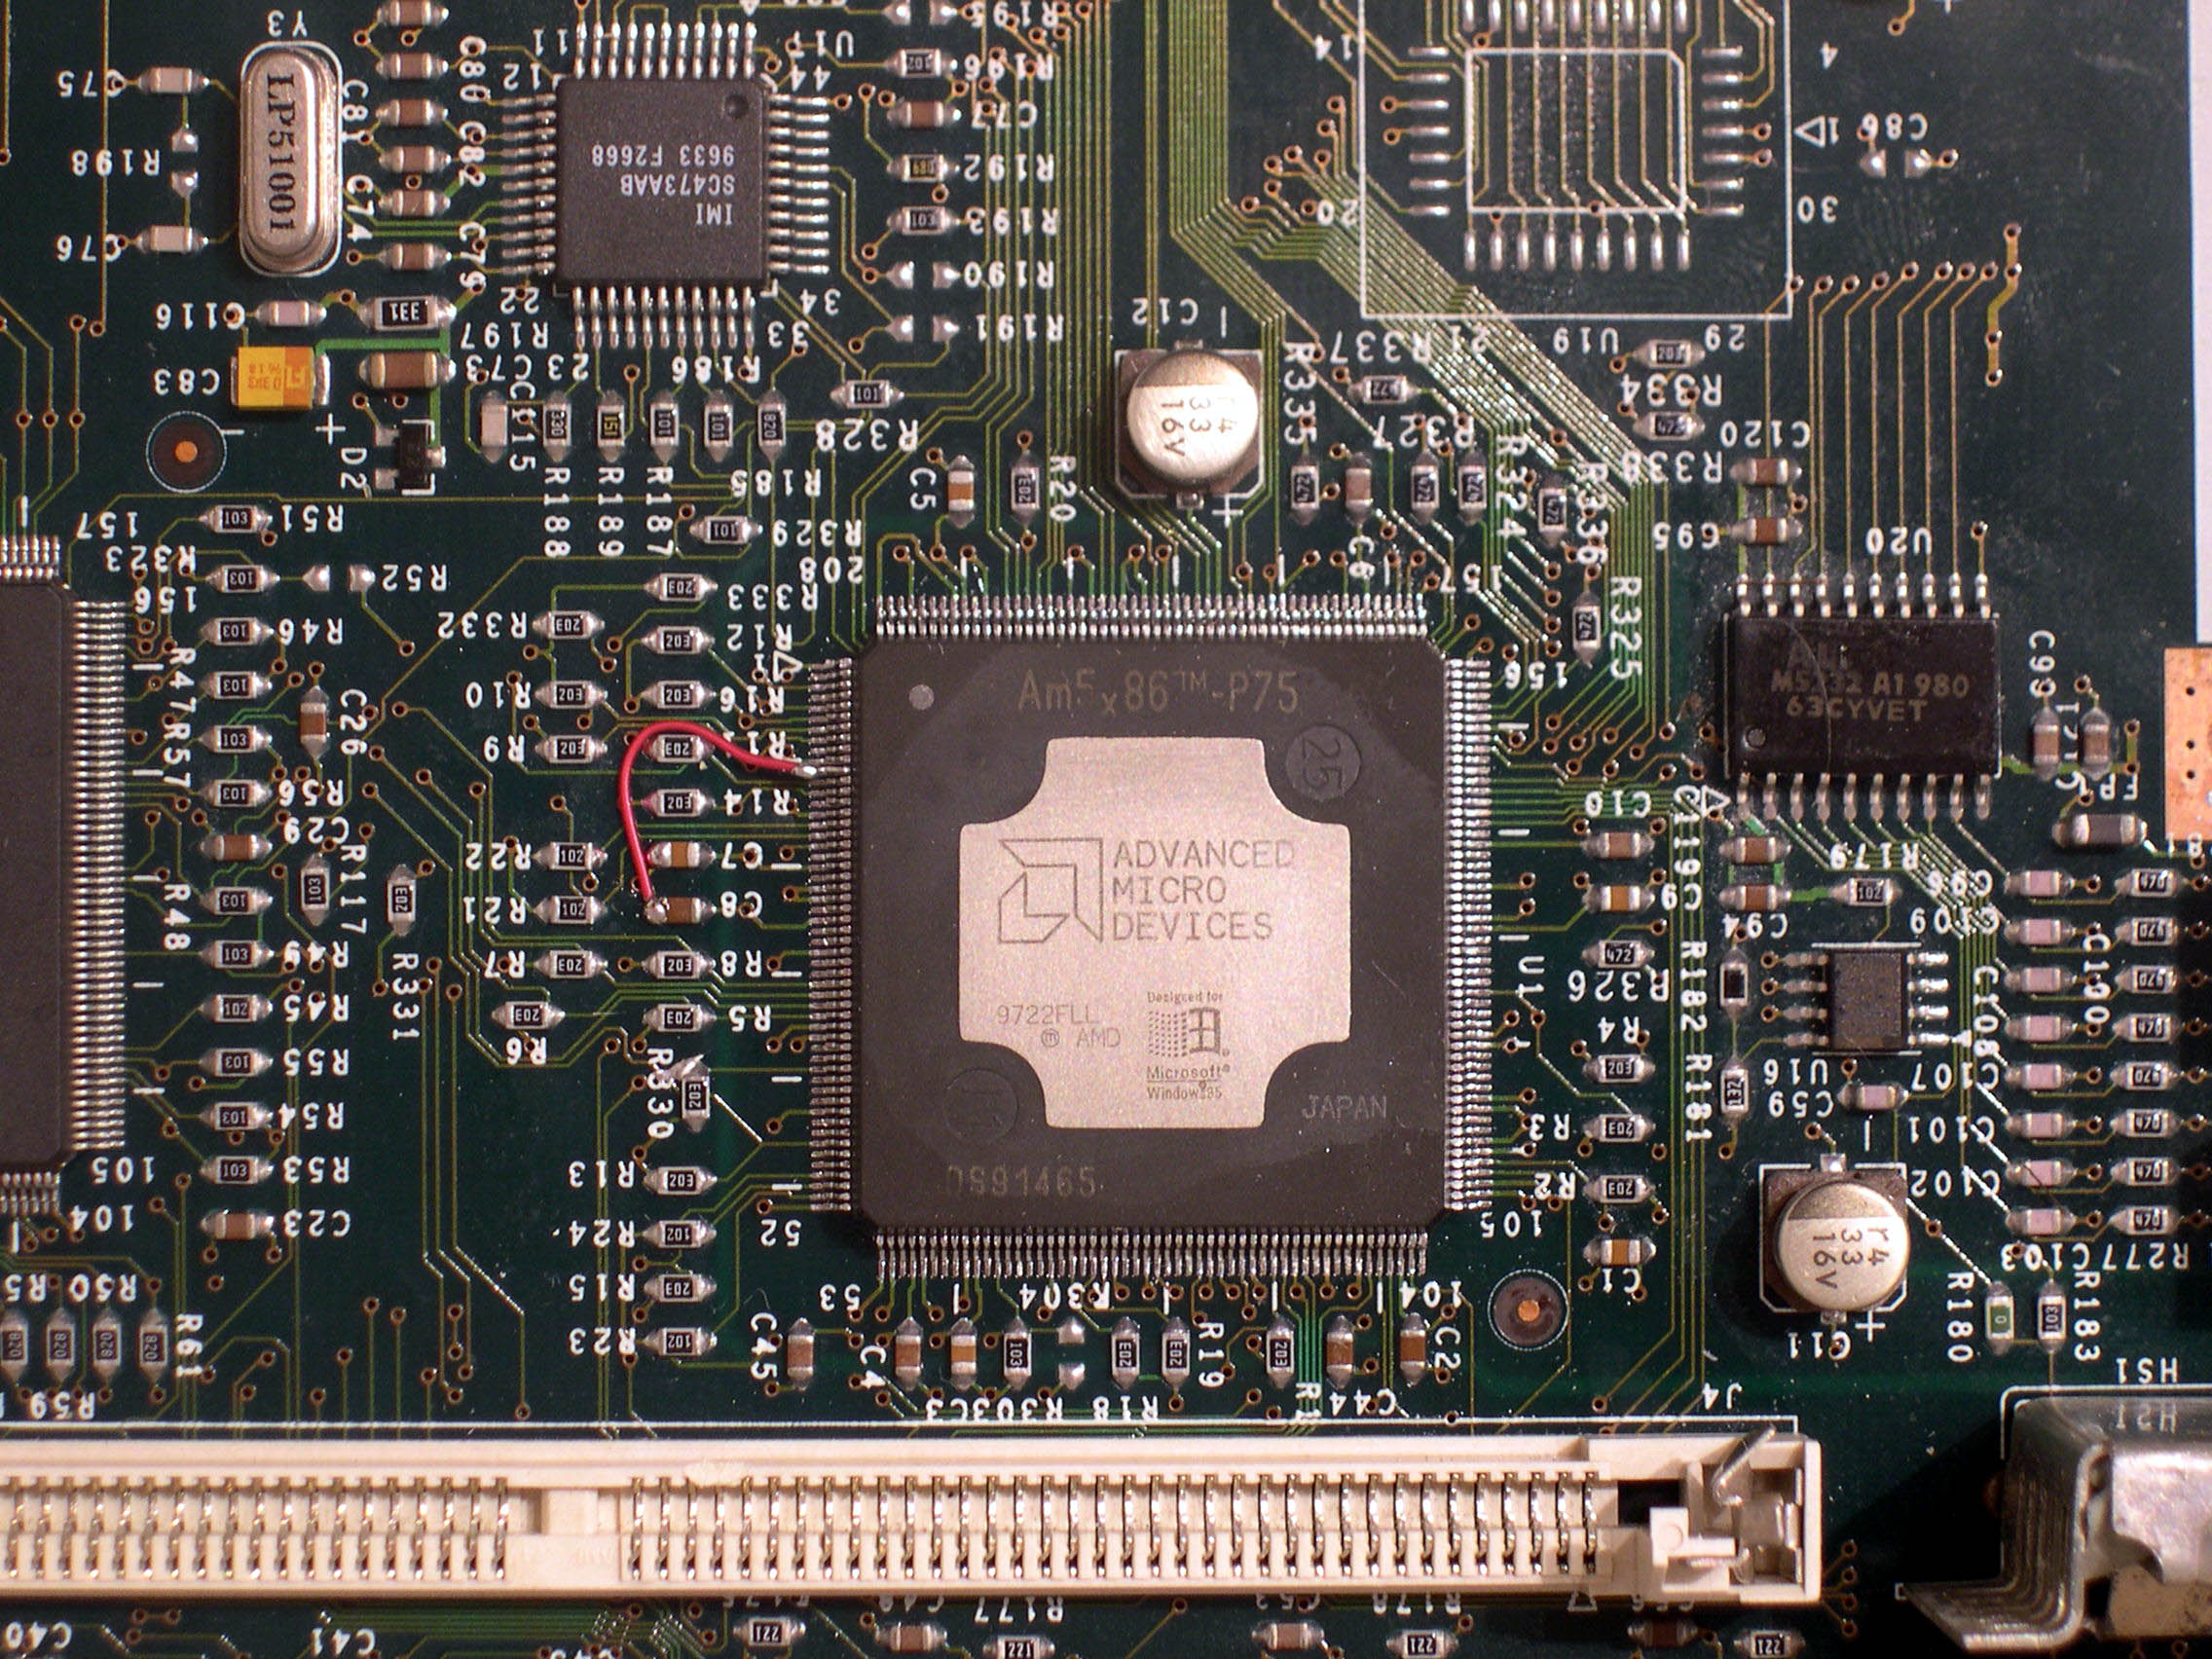
The chip package is a 208-pin SQFP (squeeze quad flat pack). The overall size of the processor is 27 millimeters square and the distance between the pins is 0.5 millimeter. While fairly low power by today's standards, the Am5x86 does consume more power and produces more head than the Am486DE2 it replaced. I fitted a small heat sink, about 25mm square, to help with cooling the processor. The heatsink was salvaged from the GPU of an old graphics card. Here it is mounted to the processor:
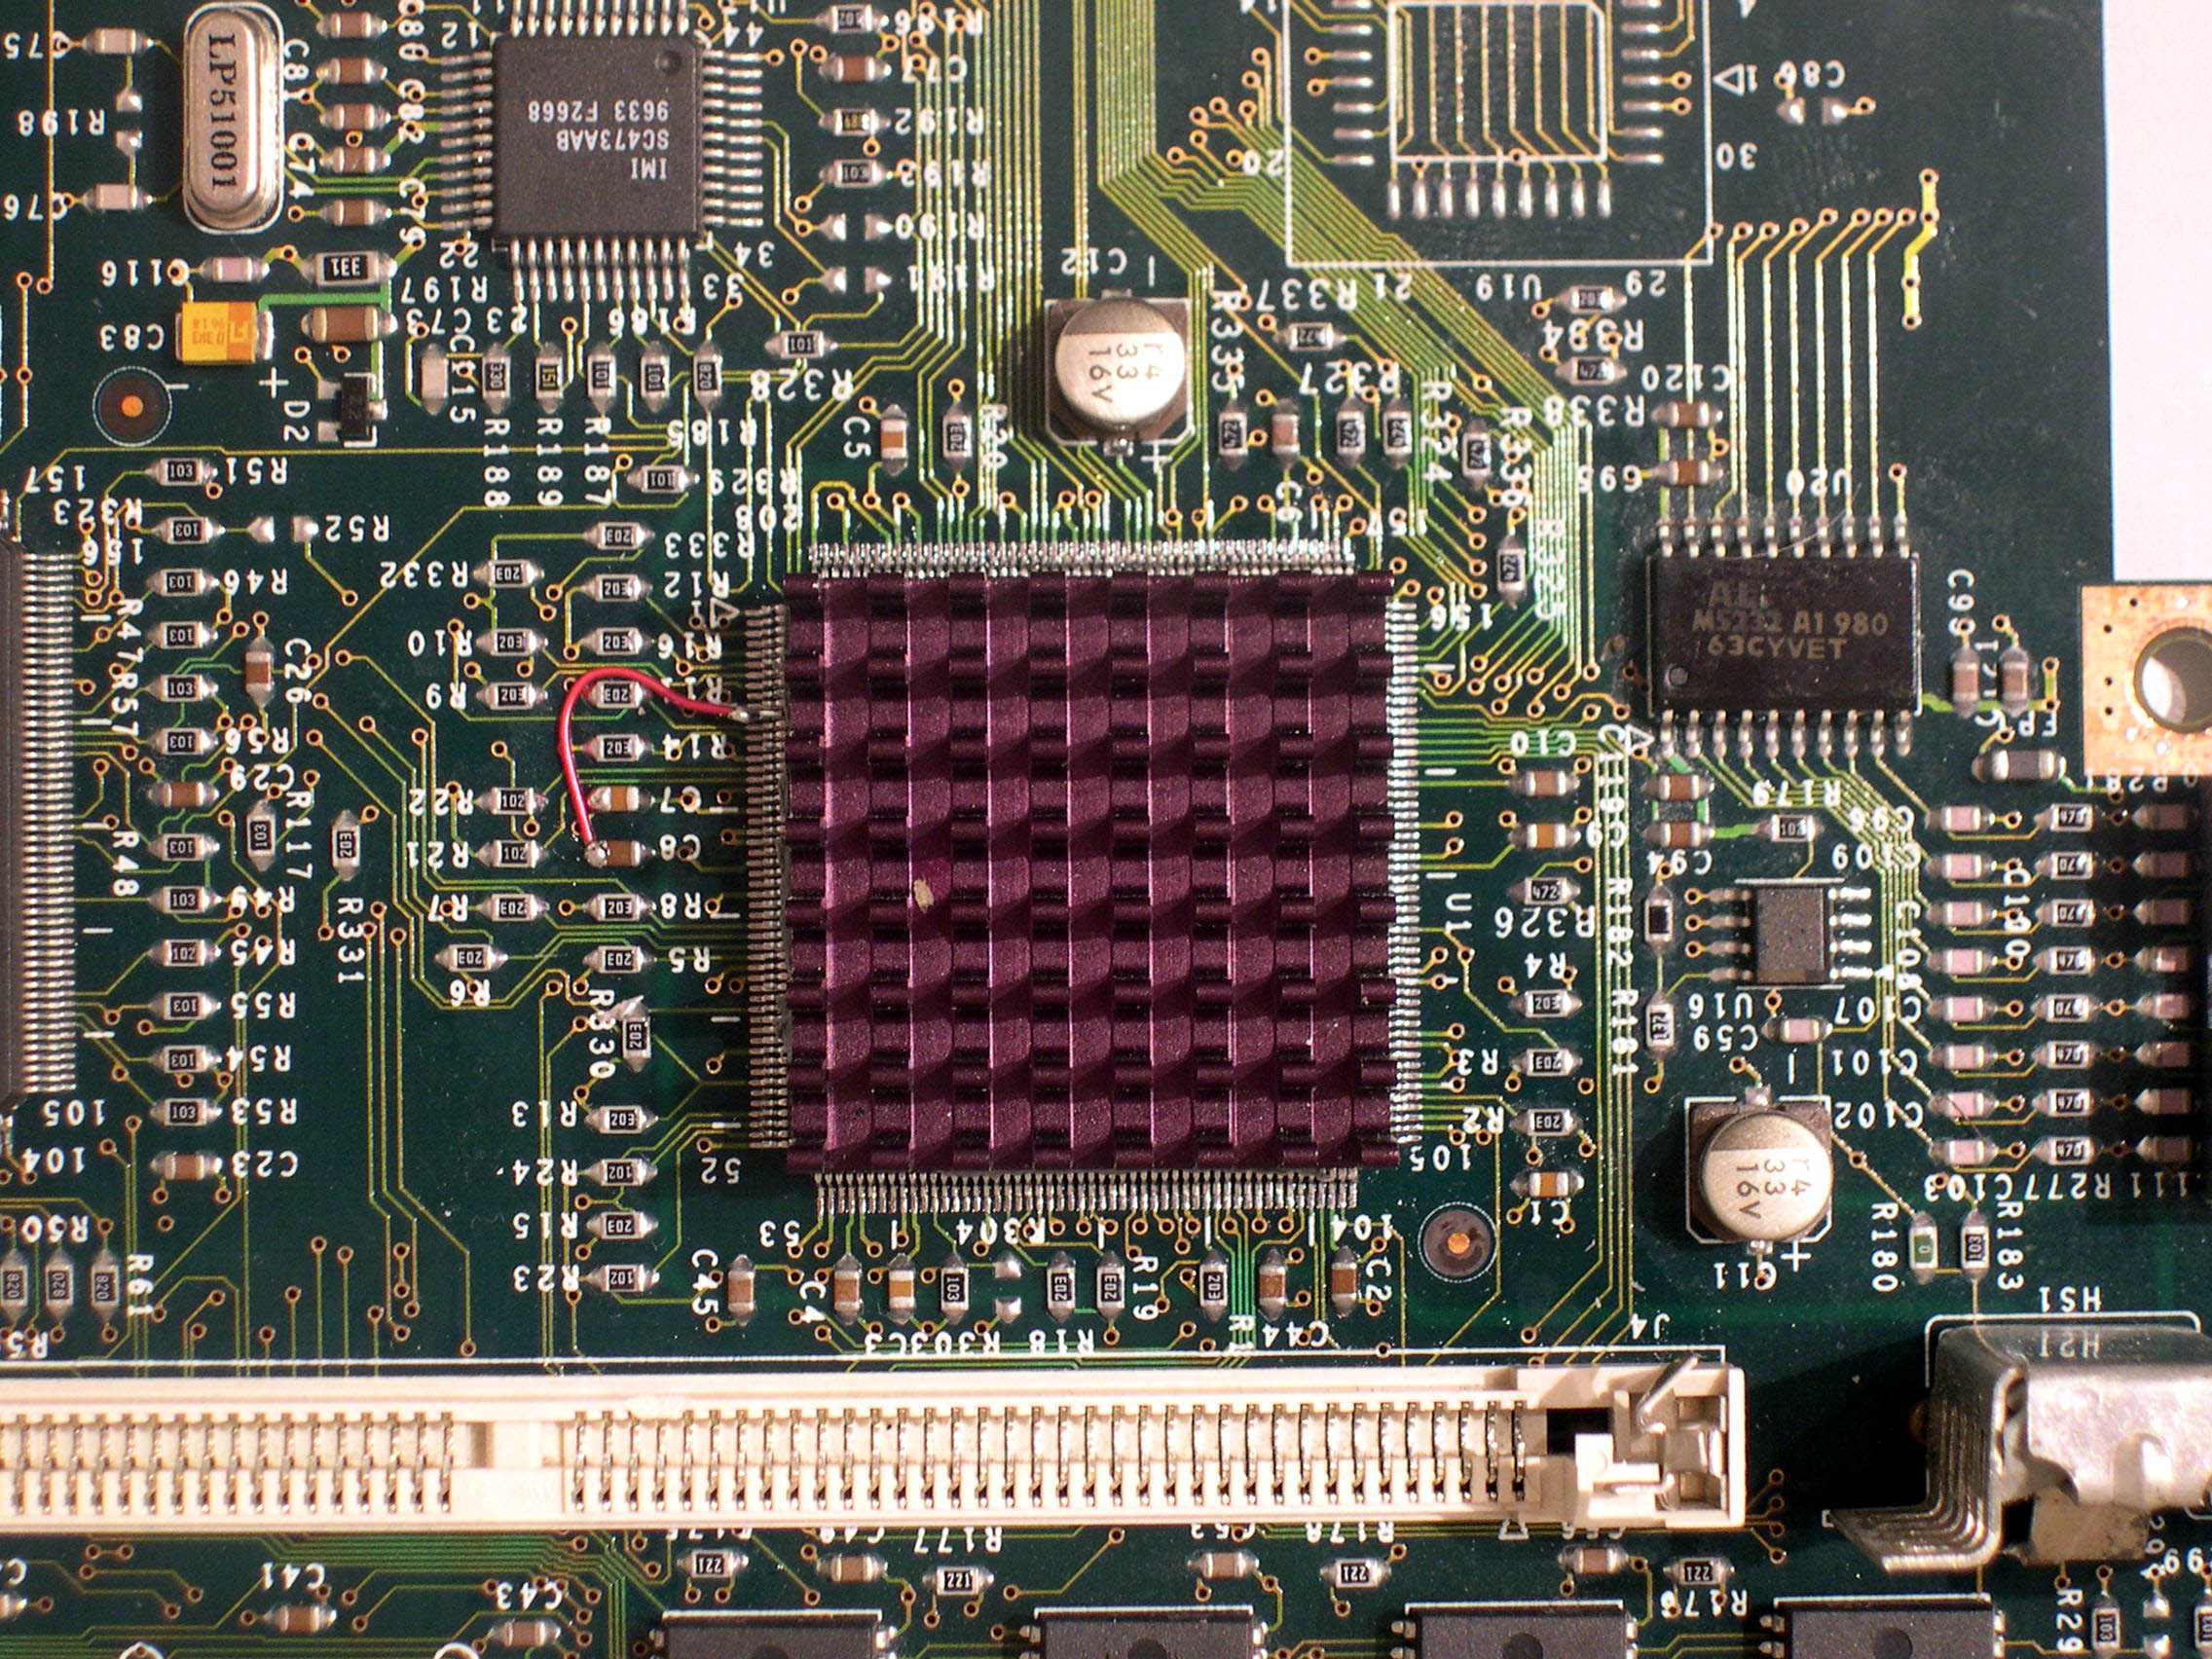
The heatsink is not very large, but seems to be adequate with the fan circulation in the Scanjet case. The upgraded Scanjet can compile its own FreeBSD kernel in about 35 minutes and the processor gets fairly warm, but not excessively so. I might still order a small (25mm x 25mm x 6mm) fan to mount to the heatsink just to be safe. In the interim, I mounted a plastic deflector in the case to help encourage more of the chassis fan's airflow to go over the processor. Here is a profile of the heatsink, giving a better idea of it's size:
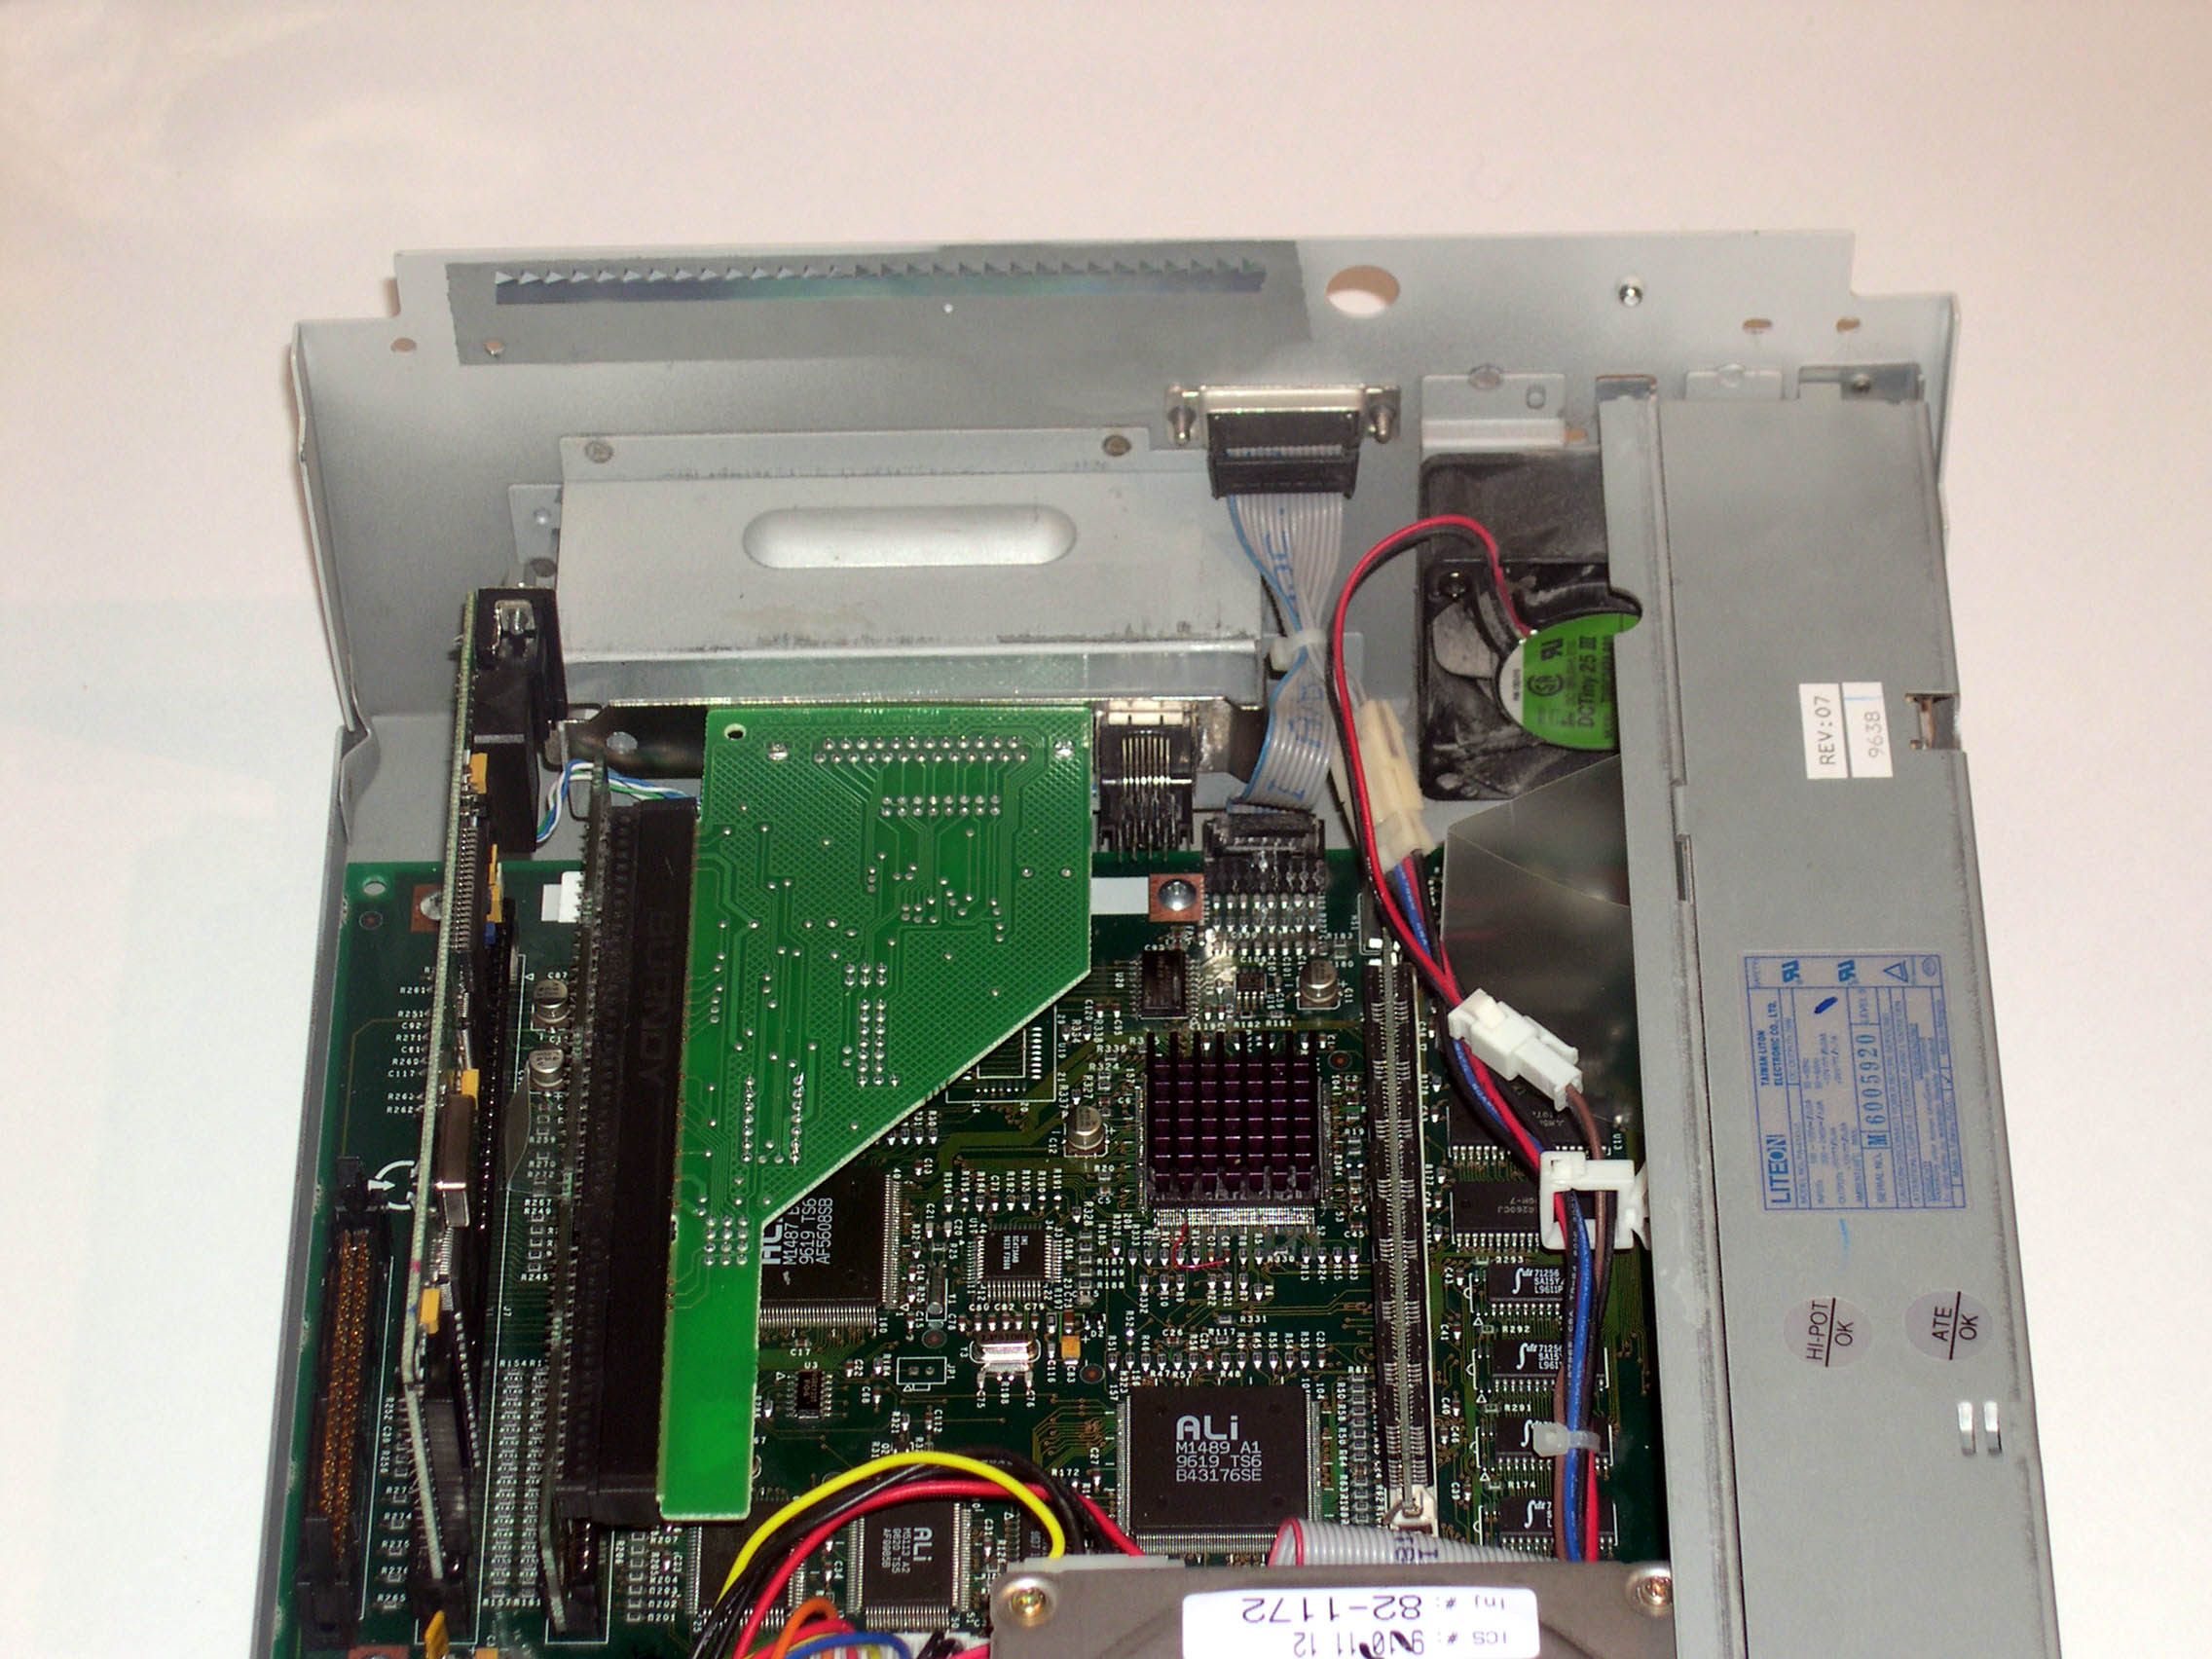
The second part of the hardware upgrades was to install a parallel port in the scanner so that it can serve as a print server for the printer which sits next to it. Curiously, this is not the printer that is normally used for the "copy" function of the scanner, but still, the location is right.
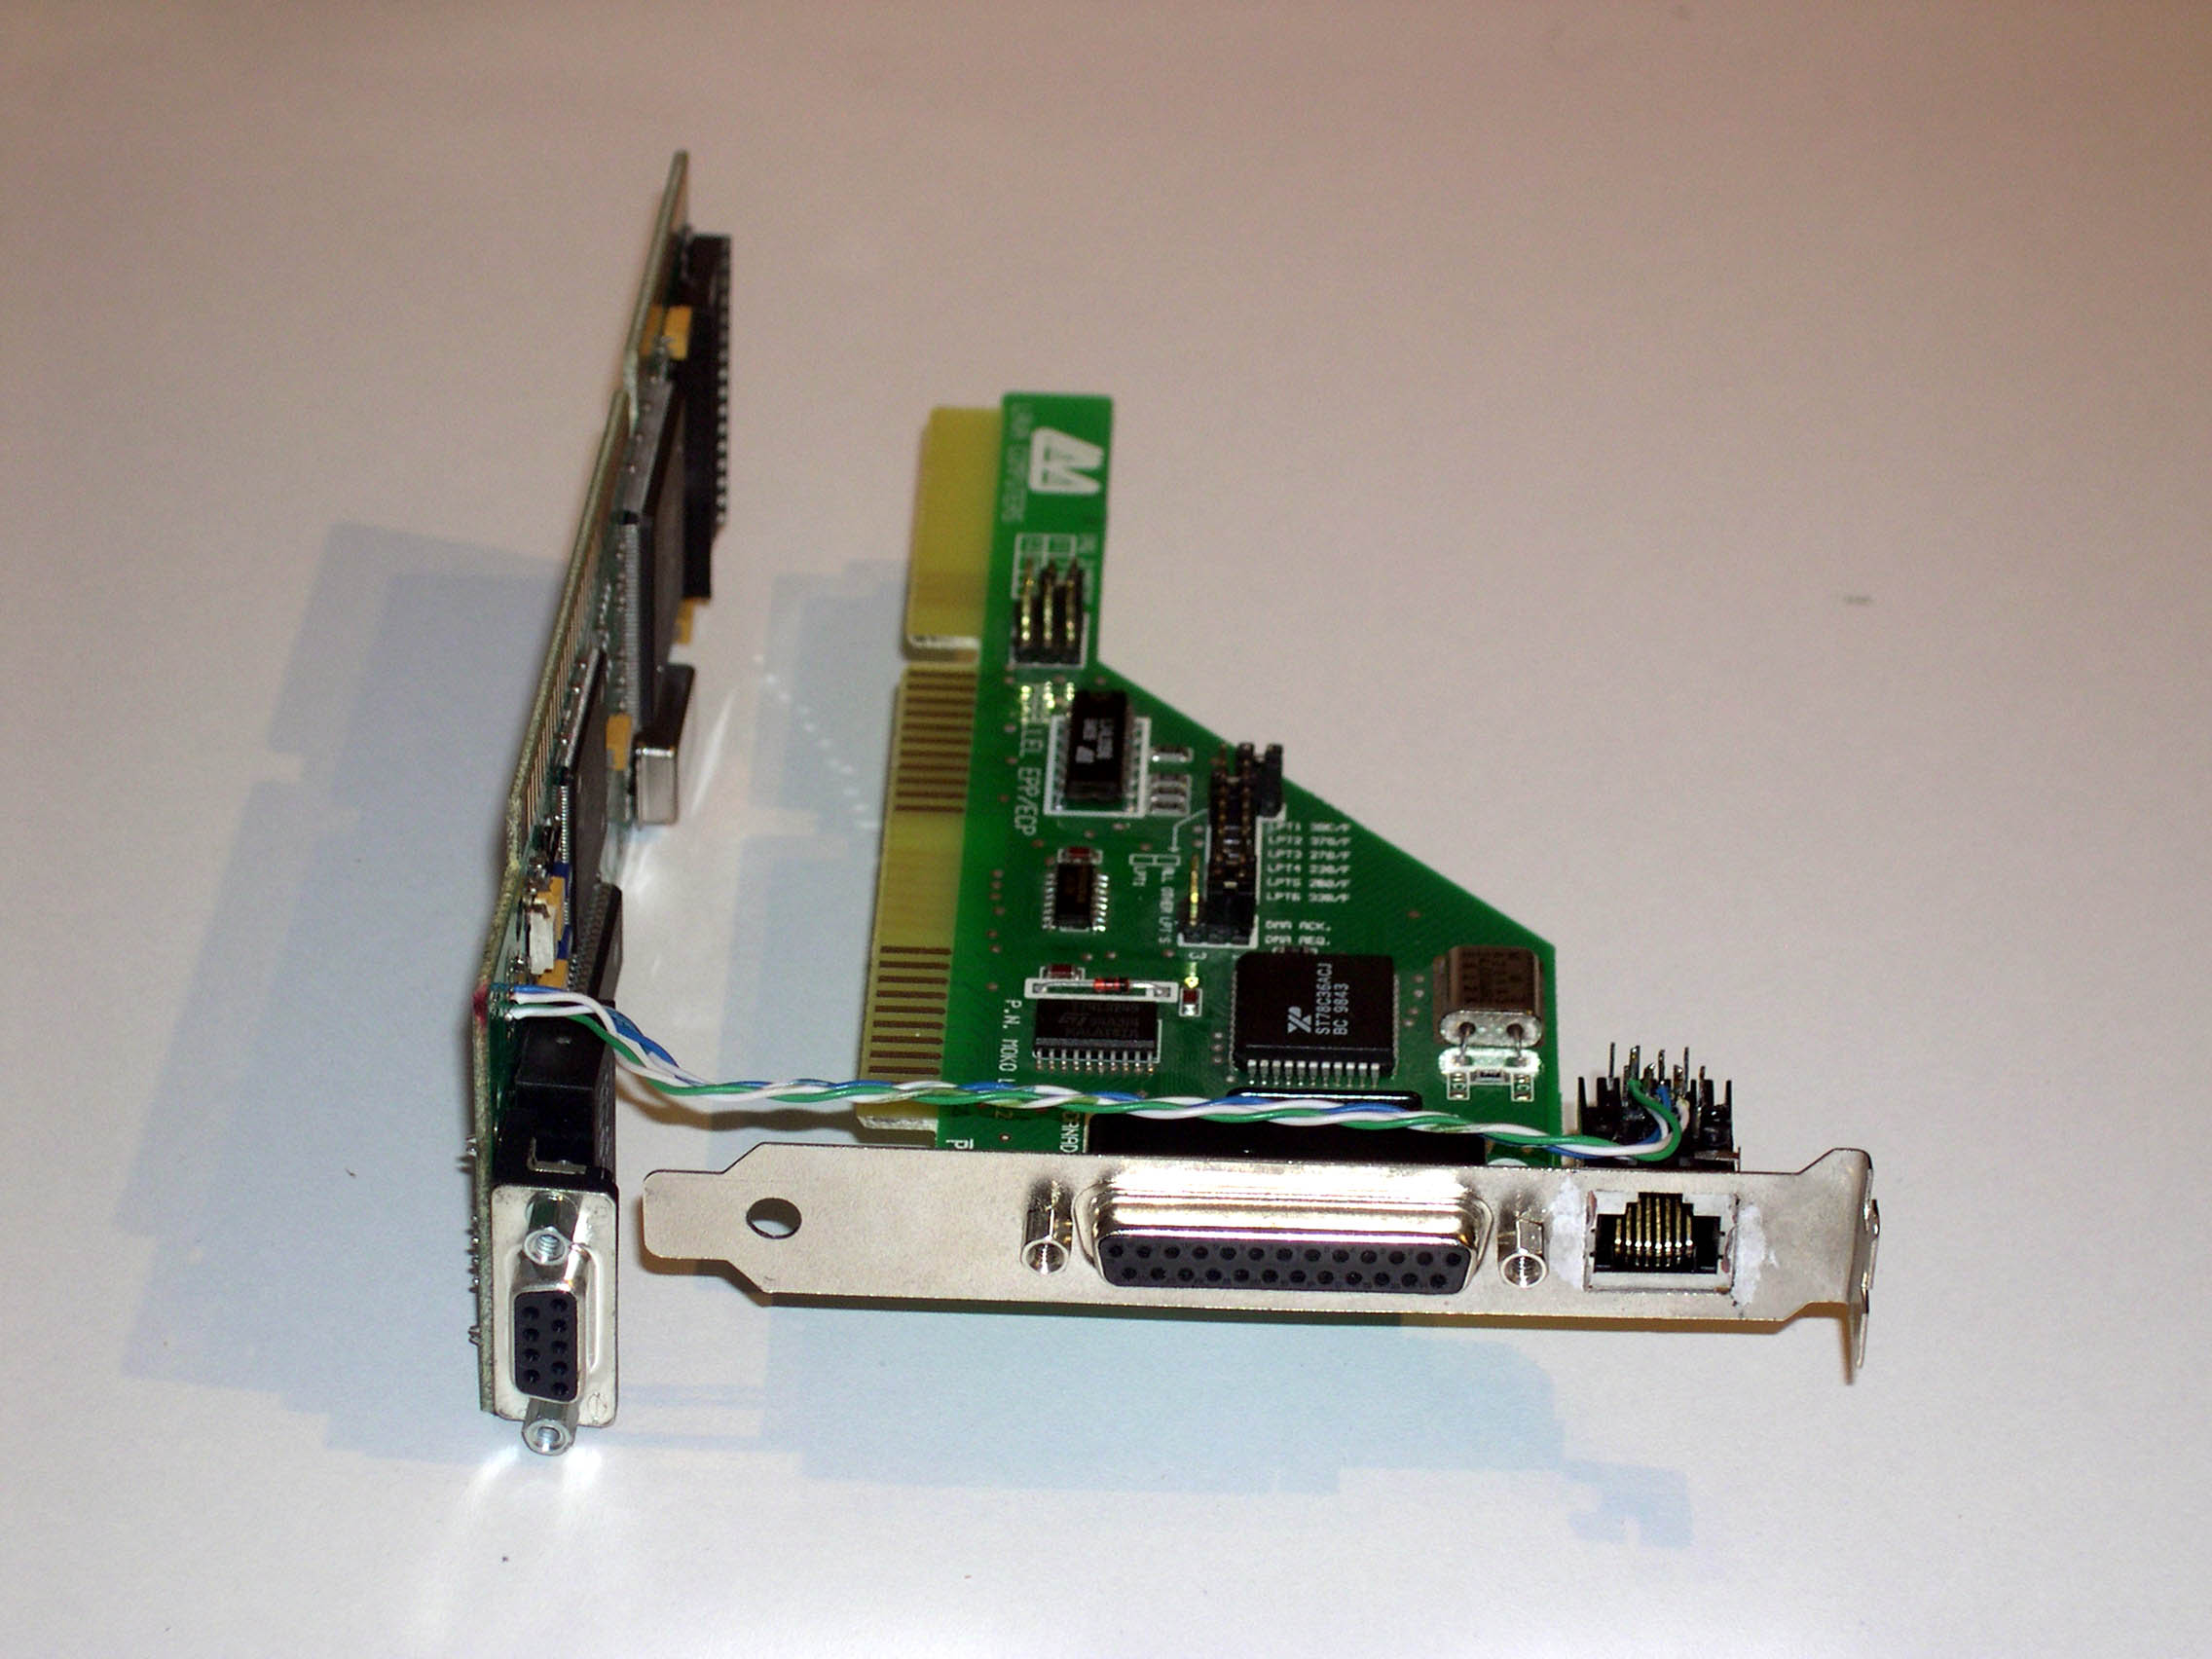
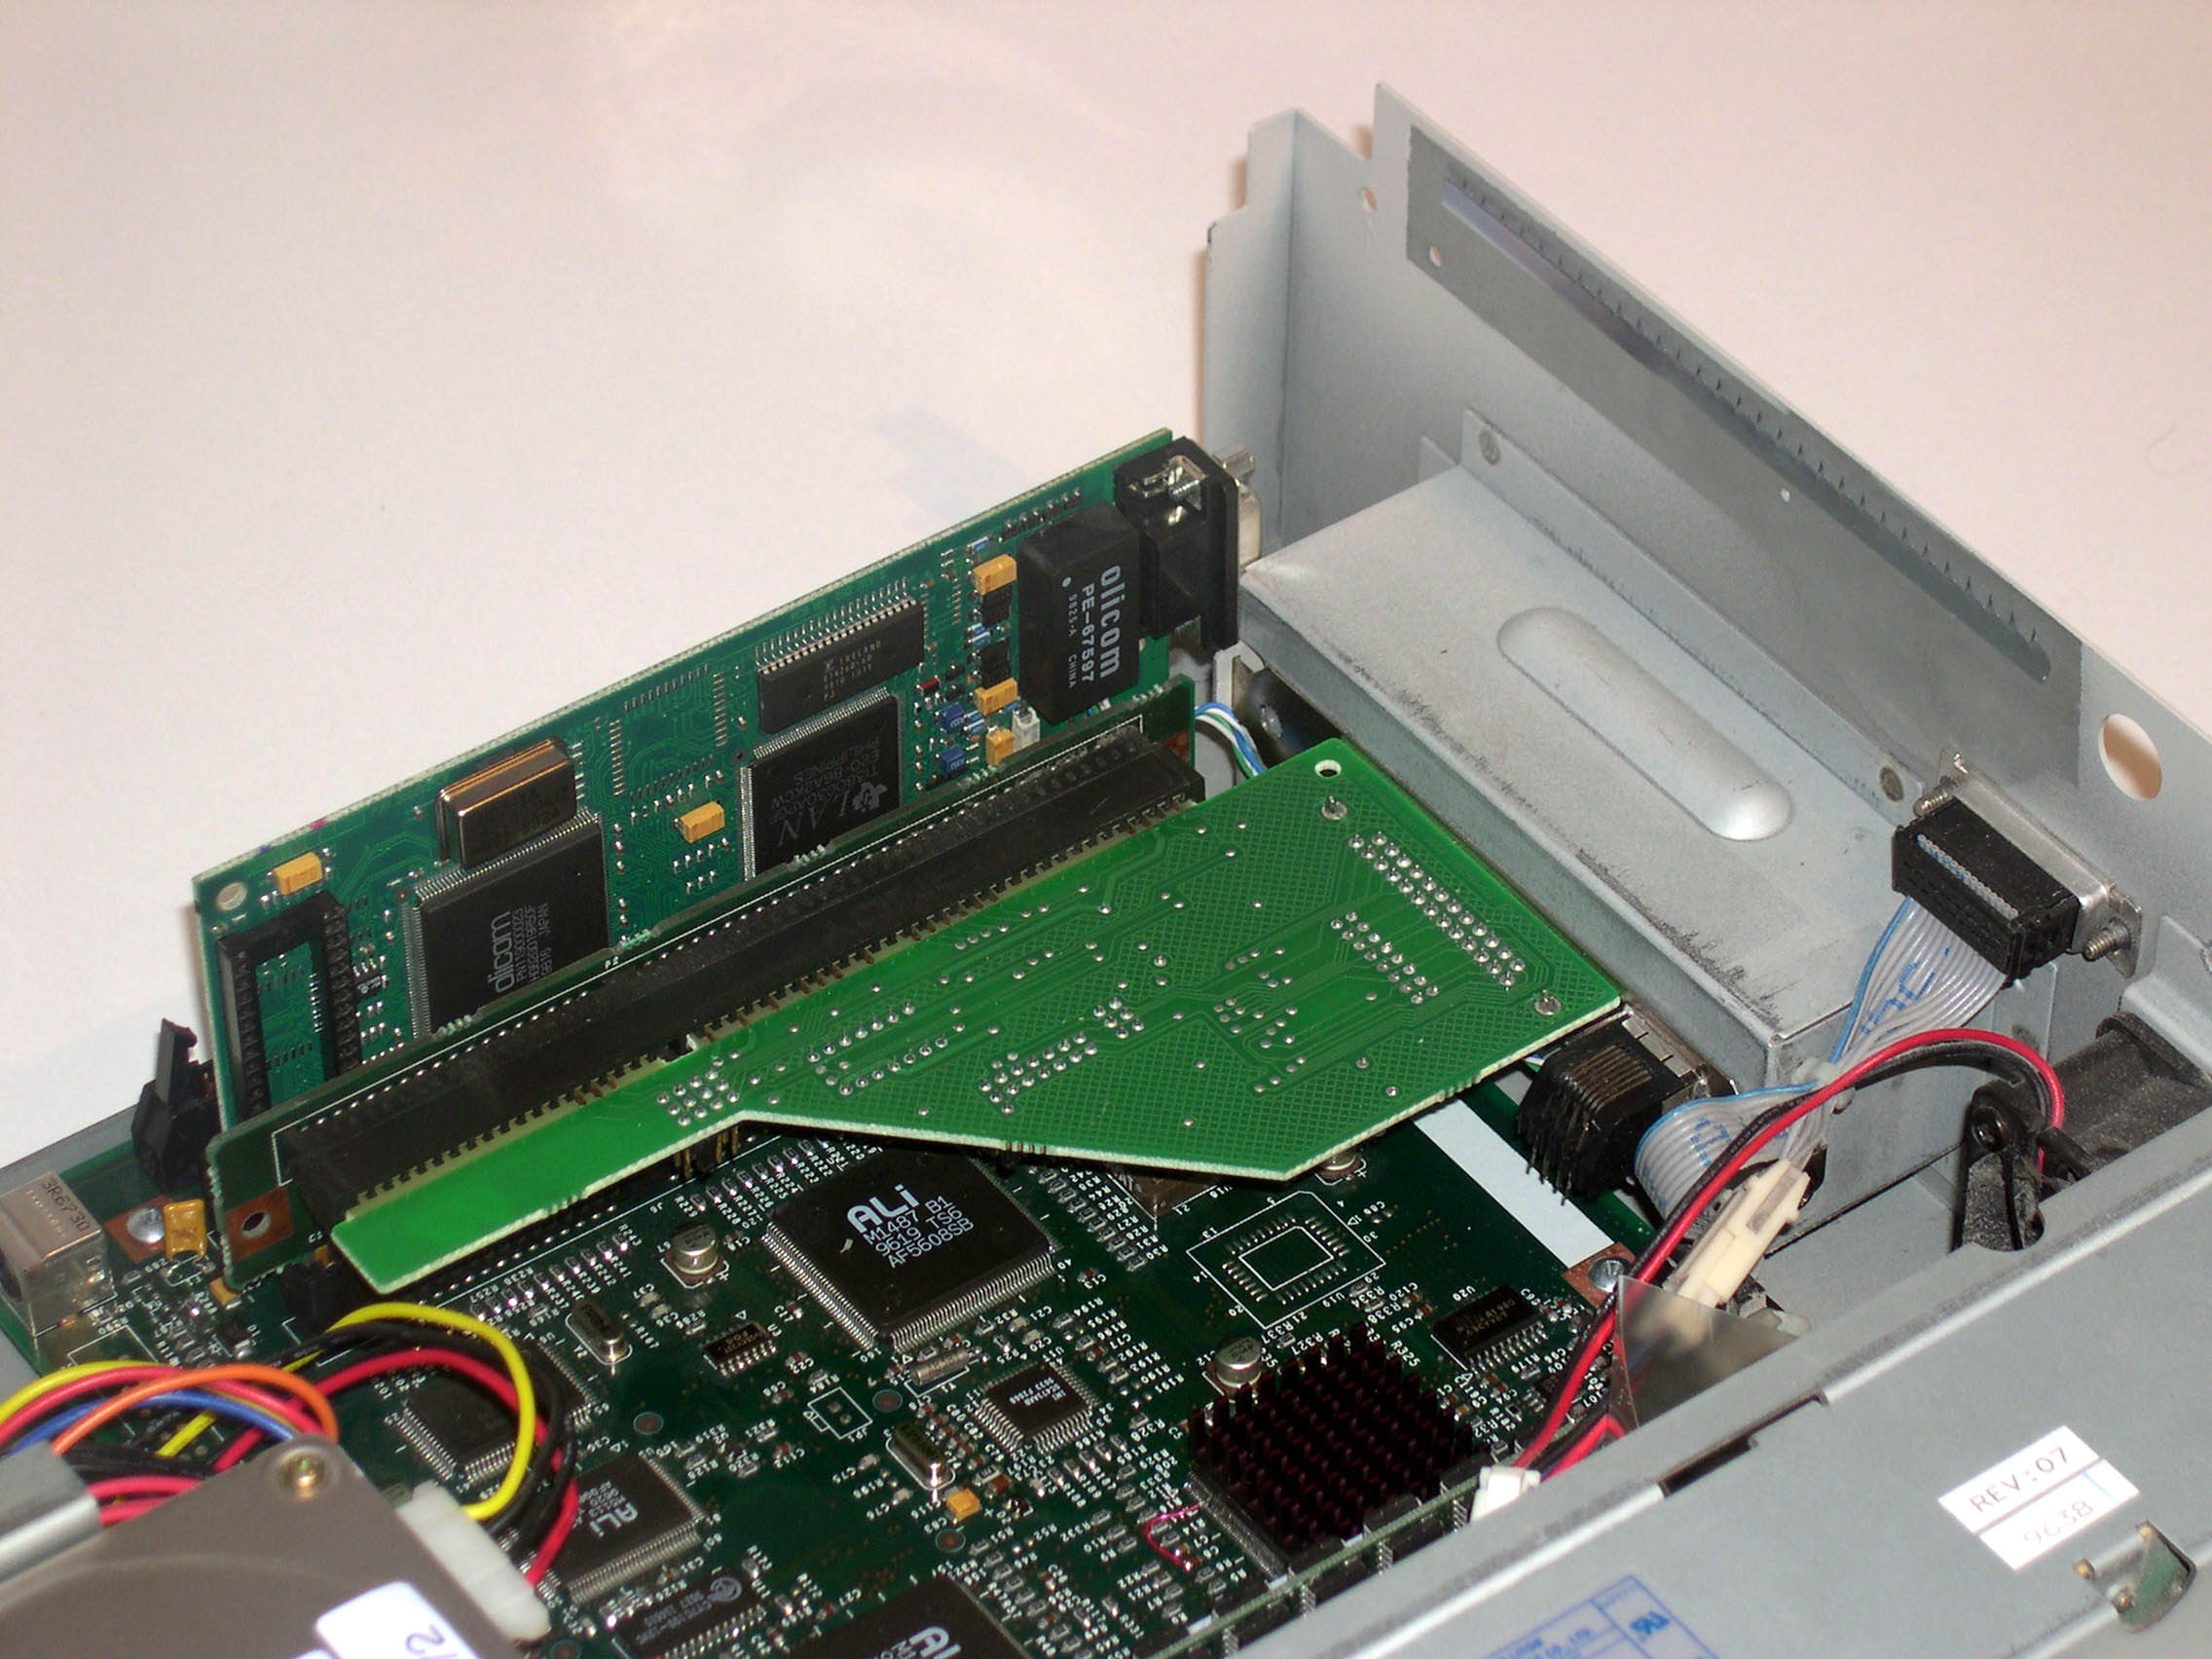
An ISA parallel card was to be installed in the slot in the scanner where the LAN card normally went, with the LAN card going into the normally unused second ISA slot in the scanner. The parallel port circuit board is short enough that there was enough unused space on the back panel bracket to mount the jack from the LAN card on the end of a twisted pair extension. Here are the modified cards as they would go into the scanner:
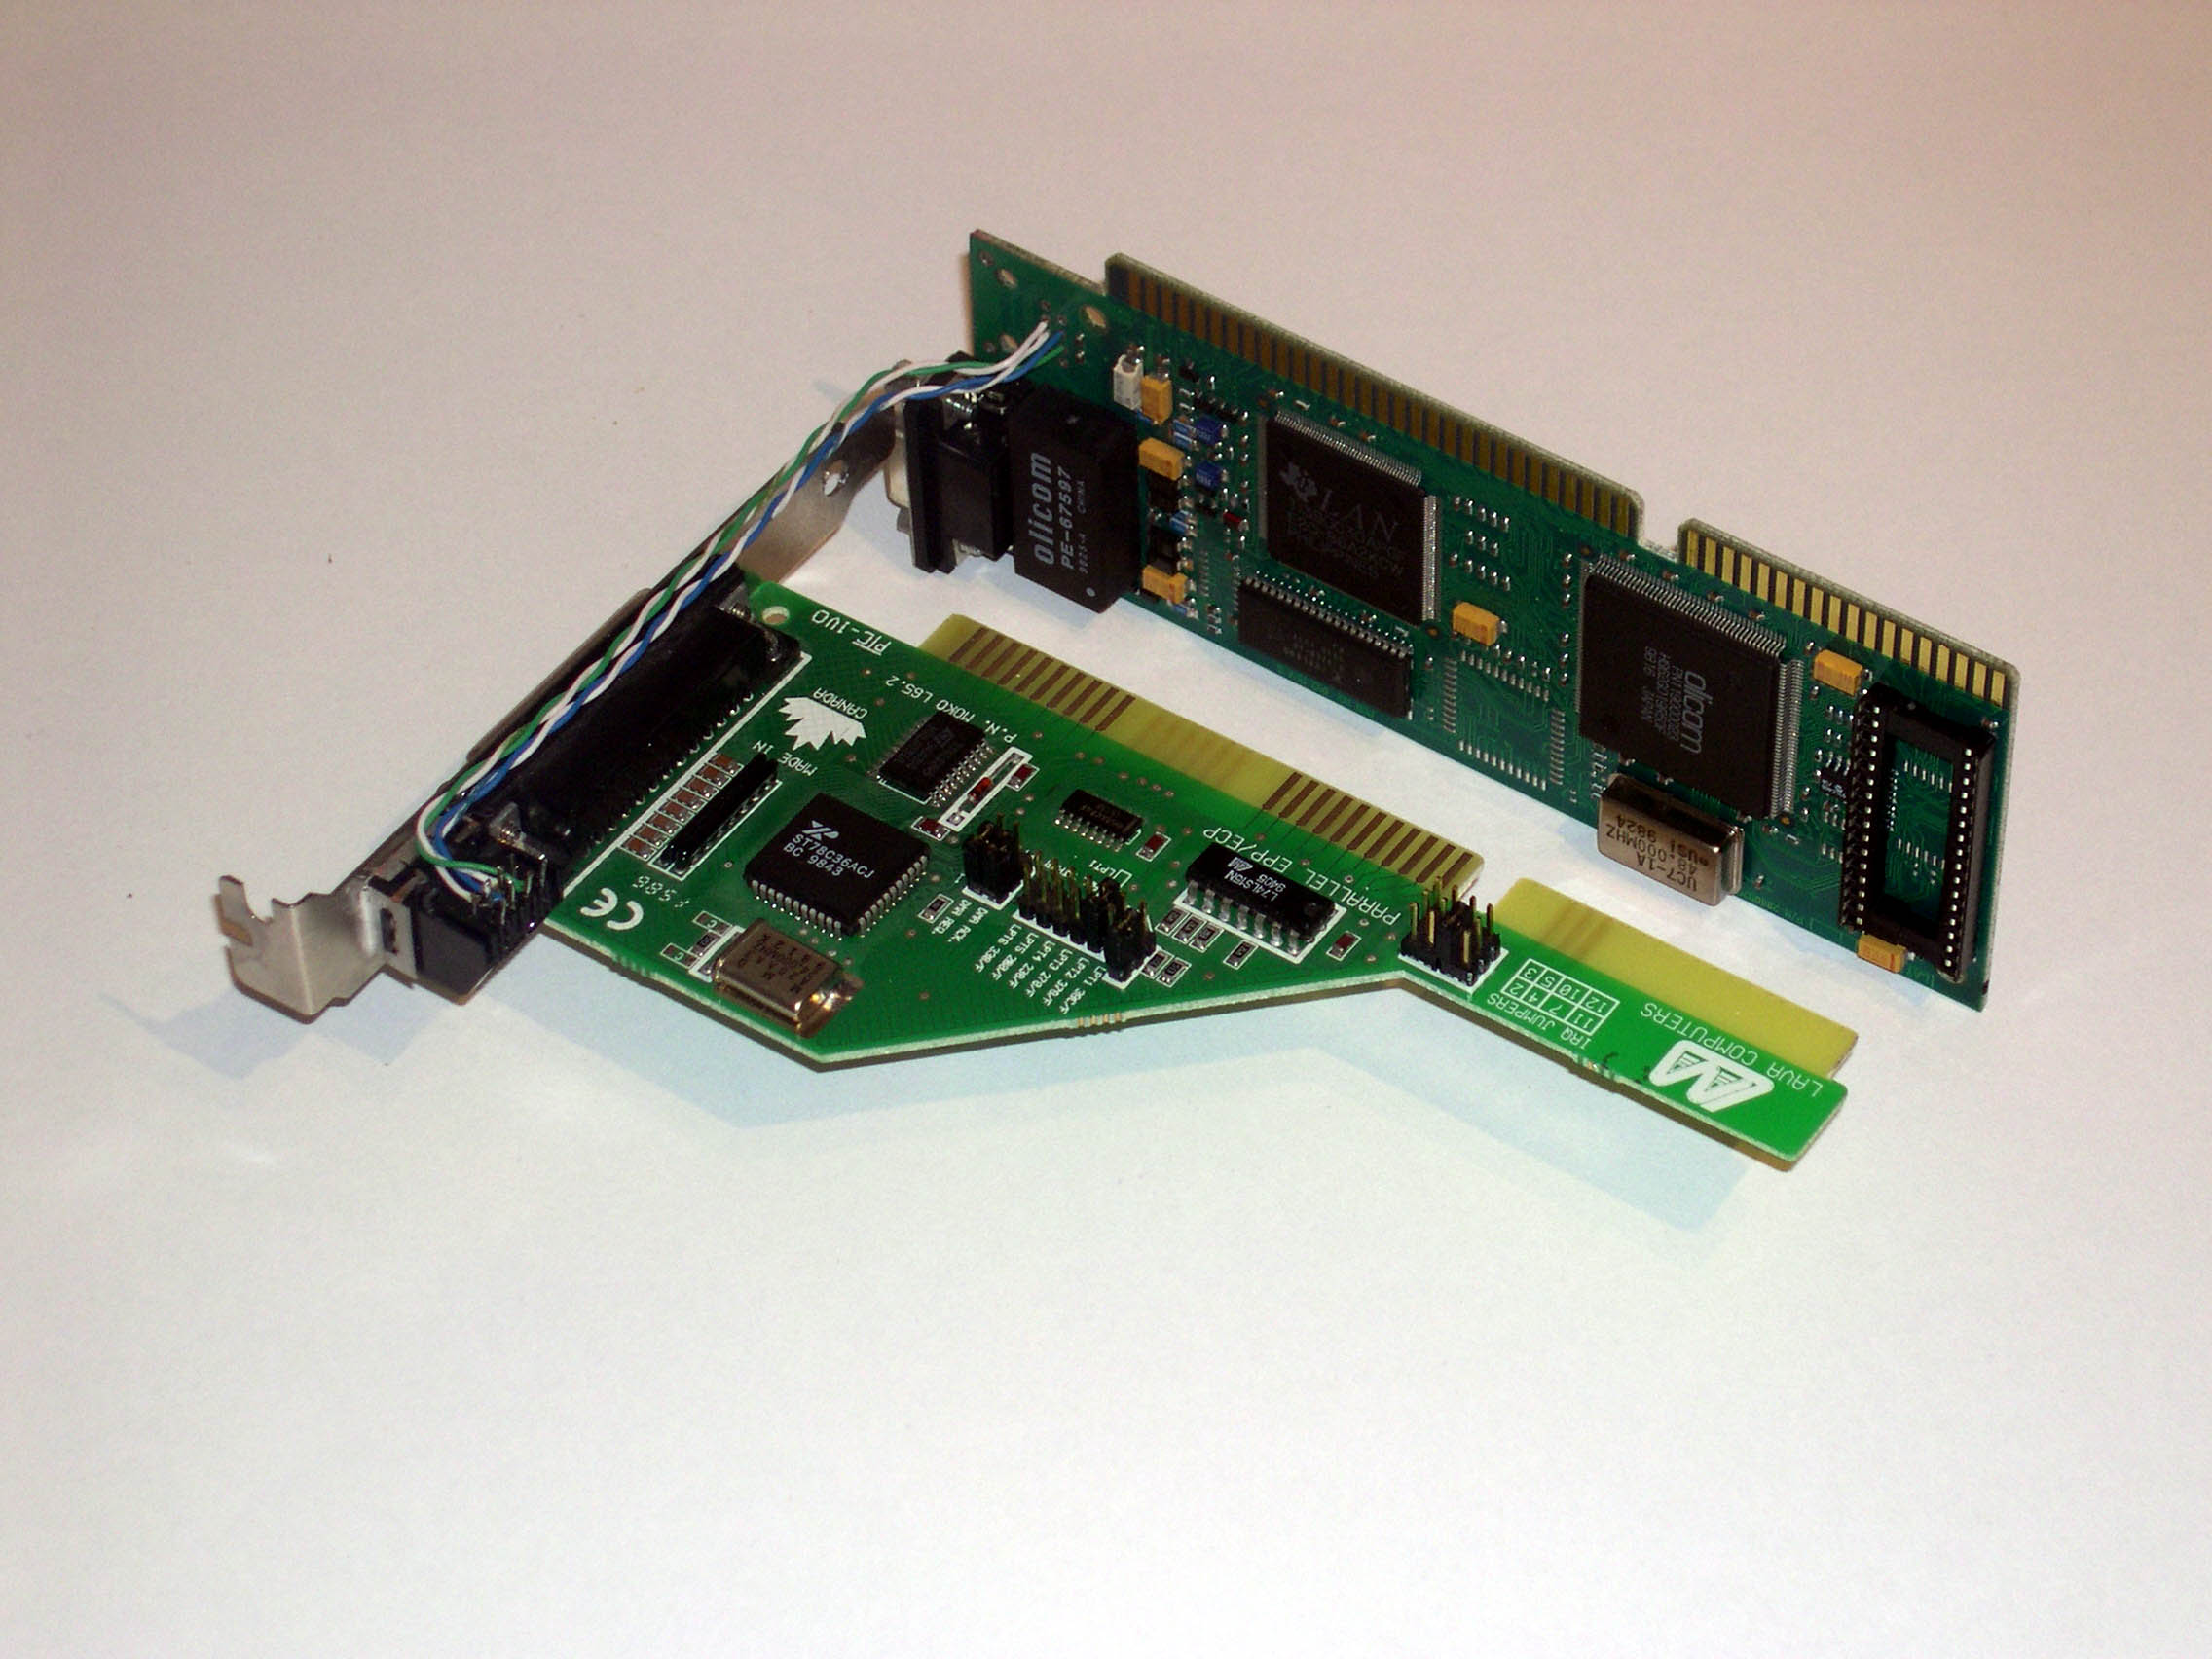
A square hole was made in the back panel bracket with a drill and a file, and the modular jack was soldered to the bracket by means of the metal shield around it. The extension of the jack back to the LAN card is by means of category 5 twisted pair cable:
The LAN card, an Olicom token ring card, is short enough to clear the top of the metal chassic no problem, although there was a plastic guide for the SCSI cable and a card guide mounted to the top of the chassis that here in the way. I removed both of those items, as they really aren't necessary. The cable guide was intended to prevent the metal edges of the hole the cable passes through from cutting into the cable; I covered the edges of the hole with two layers of vinyl electrical tape instead.
While I had the scanner apart, I took advantage of the opportunity to clean the optics, three front-silvered mirrors, a lens assembly, and the CCD itself. There was significant dust on two of the mirrors, and cleaning them has definately improved the sharpness and contrast of scans.
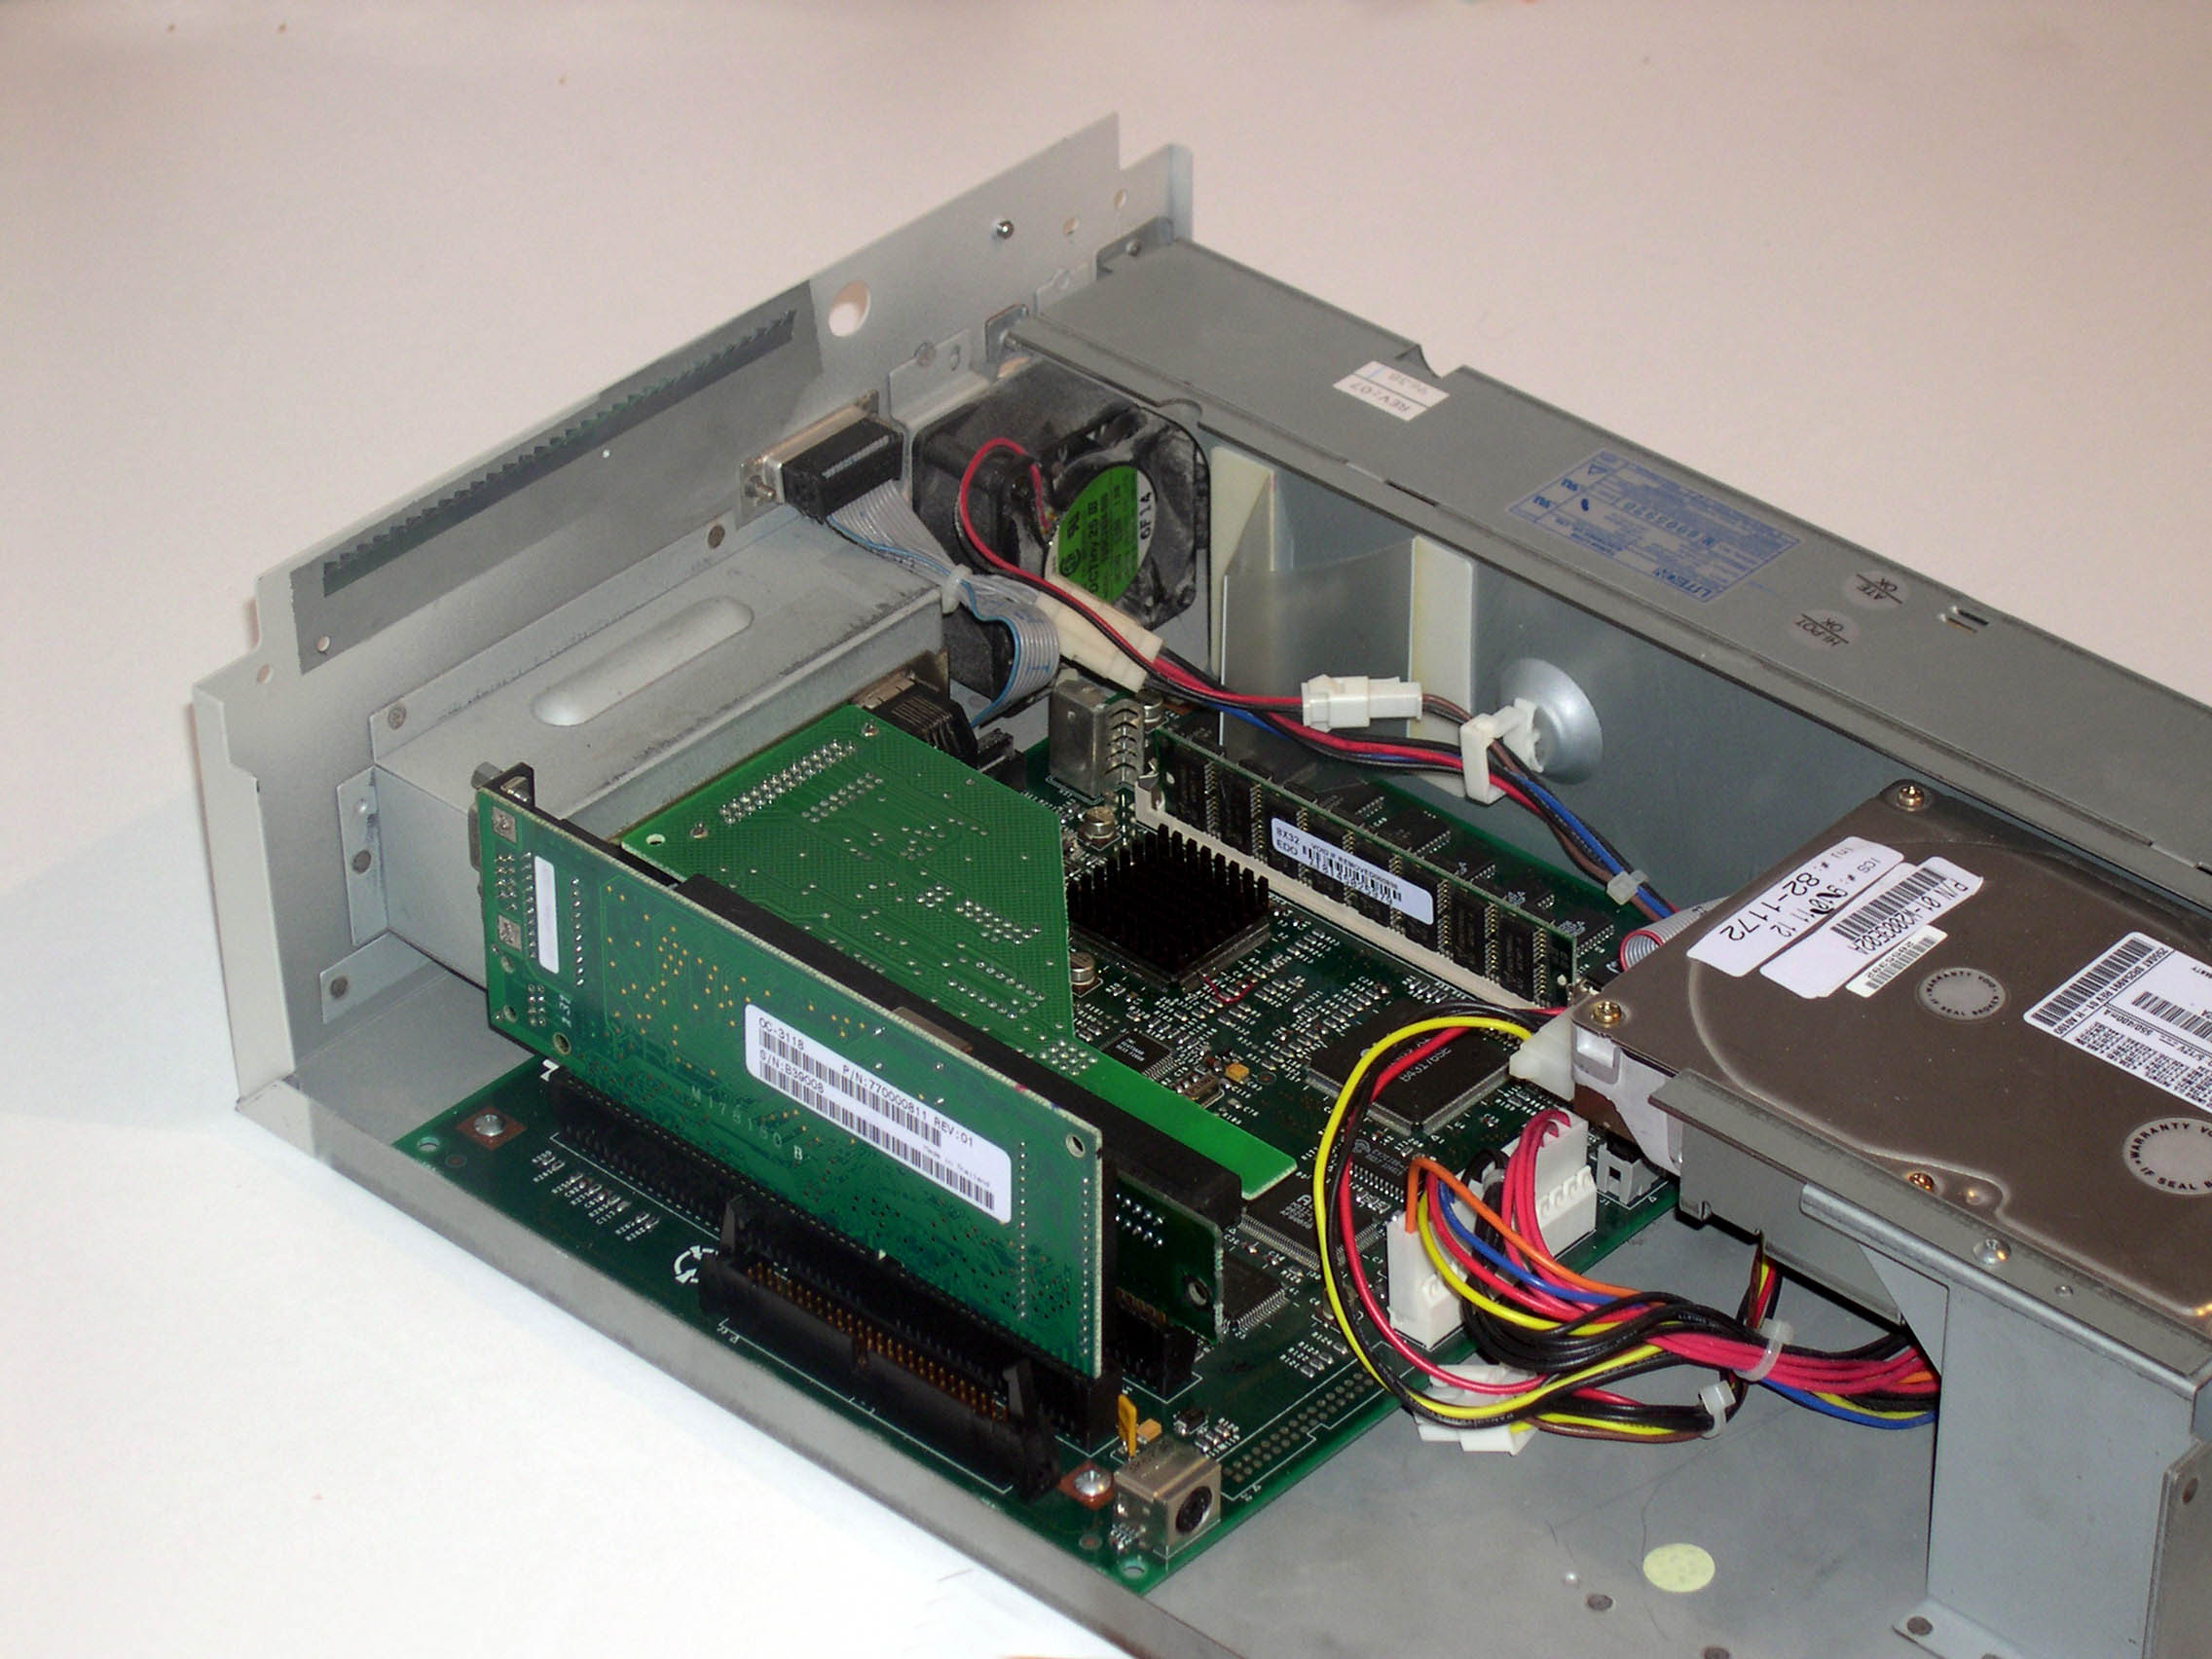
Here are a few views of the complete chassis assembly, ready to slide back into the scanner:
I added the parallel port drivers to my kernel configuration file, recompiled the kernel, and rebooted. Here are the results:
Copyright (c) 1992-2002 The FreeBSD Project.
Copyright (c) 1979, 1980, 1983, 1986, 1988, 1989, 1991, 1992, 1993, 1994
The Regents of the University of California. All rights reserved.
FreeBSD 4.7-RELEASE #0: Sat Aug 21 21:31:22 EDT 2004
scanjet@scanjet.madole.net:/usr/src/sys/compile/SCANJET
Timecounter "i8254"  frequency 1193182 Hz
CPU: AMD Am5x86 Write-Through (486-class CPU)
Origin = "AuthenticAMD"  Id = 0x4e4  Stepping = 4
Features=0x1<FPU>
real memory  = 35651584 (34816K bytes)
avail memory = 31920128 (31172K bytes)
Preloaded elf kernel "kernel" at 0xc02e9000.
pcibios: No call entry point
npx0: <math processor> on motherboard
npx0: INT 16 interface
pcib0: <Host to PCI bridge> on motherboard
pci0: <PCI bus> on pcib0
isa0: <ISA bus> on motherboard
ata0 at port 0x1f0-0x1f7,0x3f6 irq 14 on isa0
aic0: <Adaptec 6260/6360 SCSI controller> at port 0x140-0x15f irq 10 on isa0
aic0: aic6360, dma, disconnection, parity check
atkbdc0: <Keyboard controller (i8042)> at port 0x60,0x64 on isa0
sio0 at port 0x3f8-0x3ff irq 4 on isa0
sio0: type 16550A
ppc0: <Parallel port> at port 0x378-0x37f irq 7 on isa0
ppc0: SMC-like chipset (ECP/EPP/PS2/NIBBLE) in COMPATIBLE mode
ppc0: FIFO with 16/16/8 bytes threshold
ppbus0: IEEE1284 device found /NIBBLE
Probing for PnP devices on ppbus0:
ppbus0: <Hewlett-Packard LaserJet 4L> HP ENHANCED PCL5,PJL
lpt0: <Printer> on ppbus0
lpt0: Interrupt-driven port
oltr0: <Olicom Token-Ring ISA 16/4> at port 0xa00-0xa1f iomem 0xc0000-0xc1fff irq 3 drq 1 on isa0
oltr0: MAC address 00:00:83:b3:90:08
ad0: 2445MB <QUANTUM SIROCCO2550A> [4969/16/63] at ata0-master BIOSPIO
Waiting 3 seconds for SCSI devices to settle
pass0 at aic0 bus 0 target 1 lun 0
pass0: <HP C1301A 3610> Fixed Processor SCSI-2 device
pass0: 3.300MB/s transfers
Mounting root from ufs:/dev/ad0s1a
Note the "Am5x86" processor detected, and the ppbus0 and lpt0 devices. It even picks up the model of the attached printer through plug-and-play.
Because 486-class processors do not have the "TSC" timer, FreeBSD does not display the clock speed at boot time like it does with Pentium processors. So, to verify the speed of the machine was correct, I compiled the stand-alone version of the Linux kernel's "BogoMips" speed-measurement code. For 486-class processors, the BogoMips rating should be about one-half of the clock speed. Here are my results, confirming a clock speed of about 133Mhz:
# bogomips
Calibrating delay loop.. ok - 65.57 BogoMips
All that was left to do was configure a new print spooler in lpd, which was no problem. I have now sent several print jobs through the spooler -- it does make an excellent print server.
Am486DE2 Microprocessor Datasheet, the guide to the original processor in the Network Scanjet 5. This was used to learn the characteristics of this processor and determine compatibility with the replacement.
Am5x86 Microprocessor Family Datasheet, the guide to processor that I installed in the scanner. This was used to verify compatibility with the original processor, and also to learn the details of the clock multiplier selection logic.
Chip Quik, a very low-temperature melting point alloy that allows rework of surface-mount components without special equipment.
BogoMips mini-Howto, which explains what BogoMips are, how to use them, and what different types of systems should score.
BogoMips standalone utility, which measures a machines "BogoMips" speed under any operating system, not just Linux.
|
Web hosting by Omd3.com Hosting Services |
David S. Madole 2004-08-22 1830 GMT |